

Potter to Potter: Frozen Pond Technique with Danielle Chouhan
About the Potter to Potter Series
Welcome to the Potter to Potter Series, a collection of blog posts where hobbyist and professional potters share their favorite techniques and clay wisdom in the spirit of learning and community.
In this feature, Danielle Chouhan of Clay Arts Studio C shares her glaze combinations, firing schedule adjustments, and troubleshooting tips for achieving the popular ceramic glaze surface decoration: The Frozen Pond Technique.
Why has the Frozen Pond glaze technique gone viral among potters?
Pioneered by Kathy McGuire, the Frozen Pond technique—named for its resemblance to bubbles frozen in a pond—has gone viral among potters on Instagram and across social media.
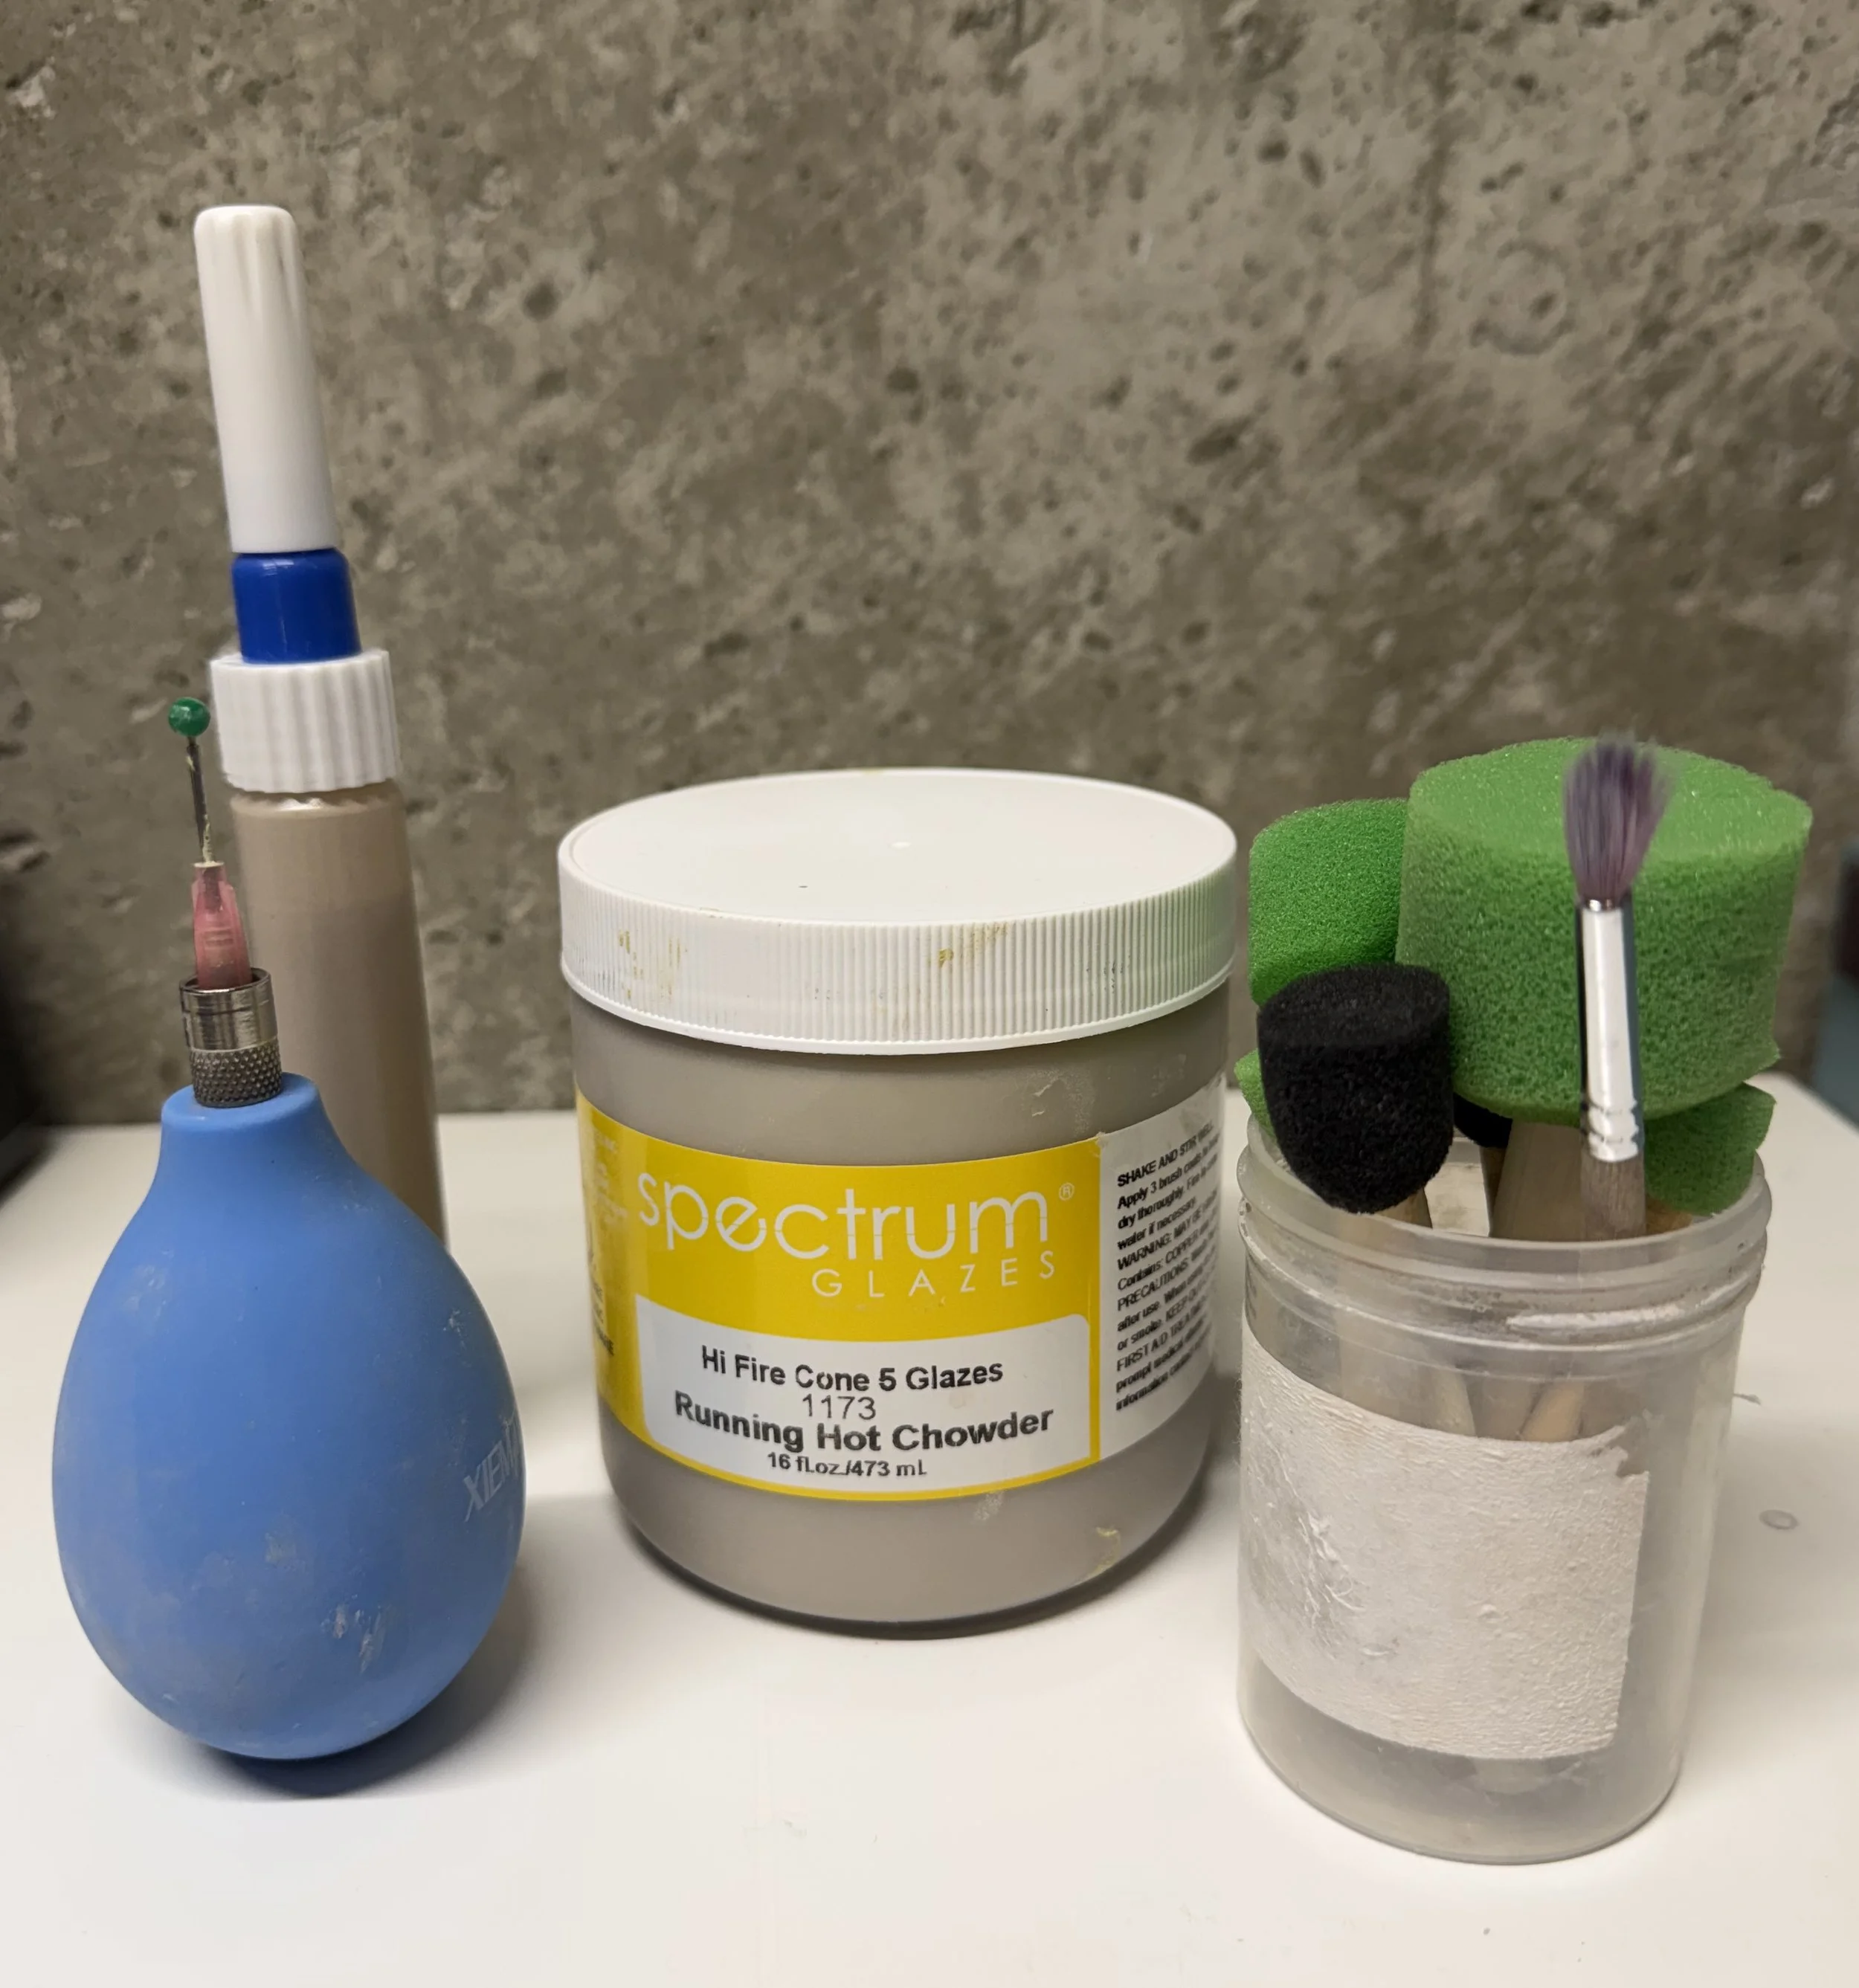
The technique involves:
A stable base glaze
Spectrum’s Running Hot Chowder (RHC) as the middle layer
A flowing top glaze
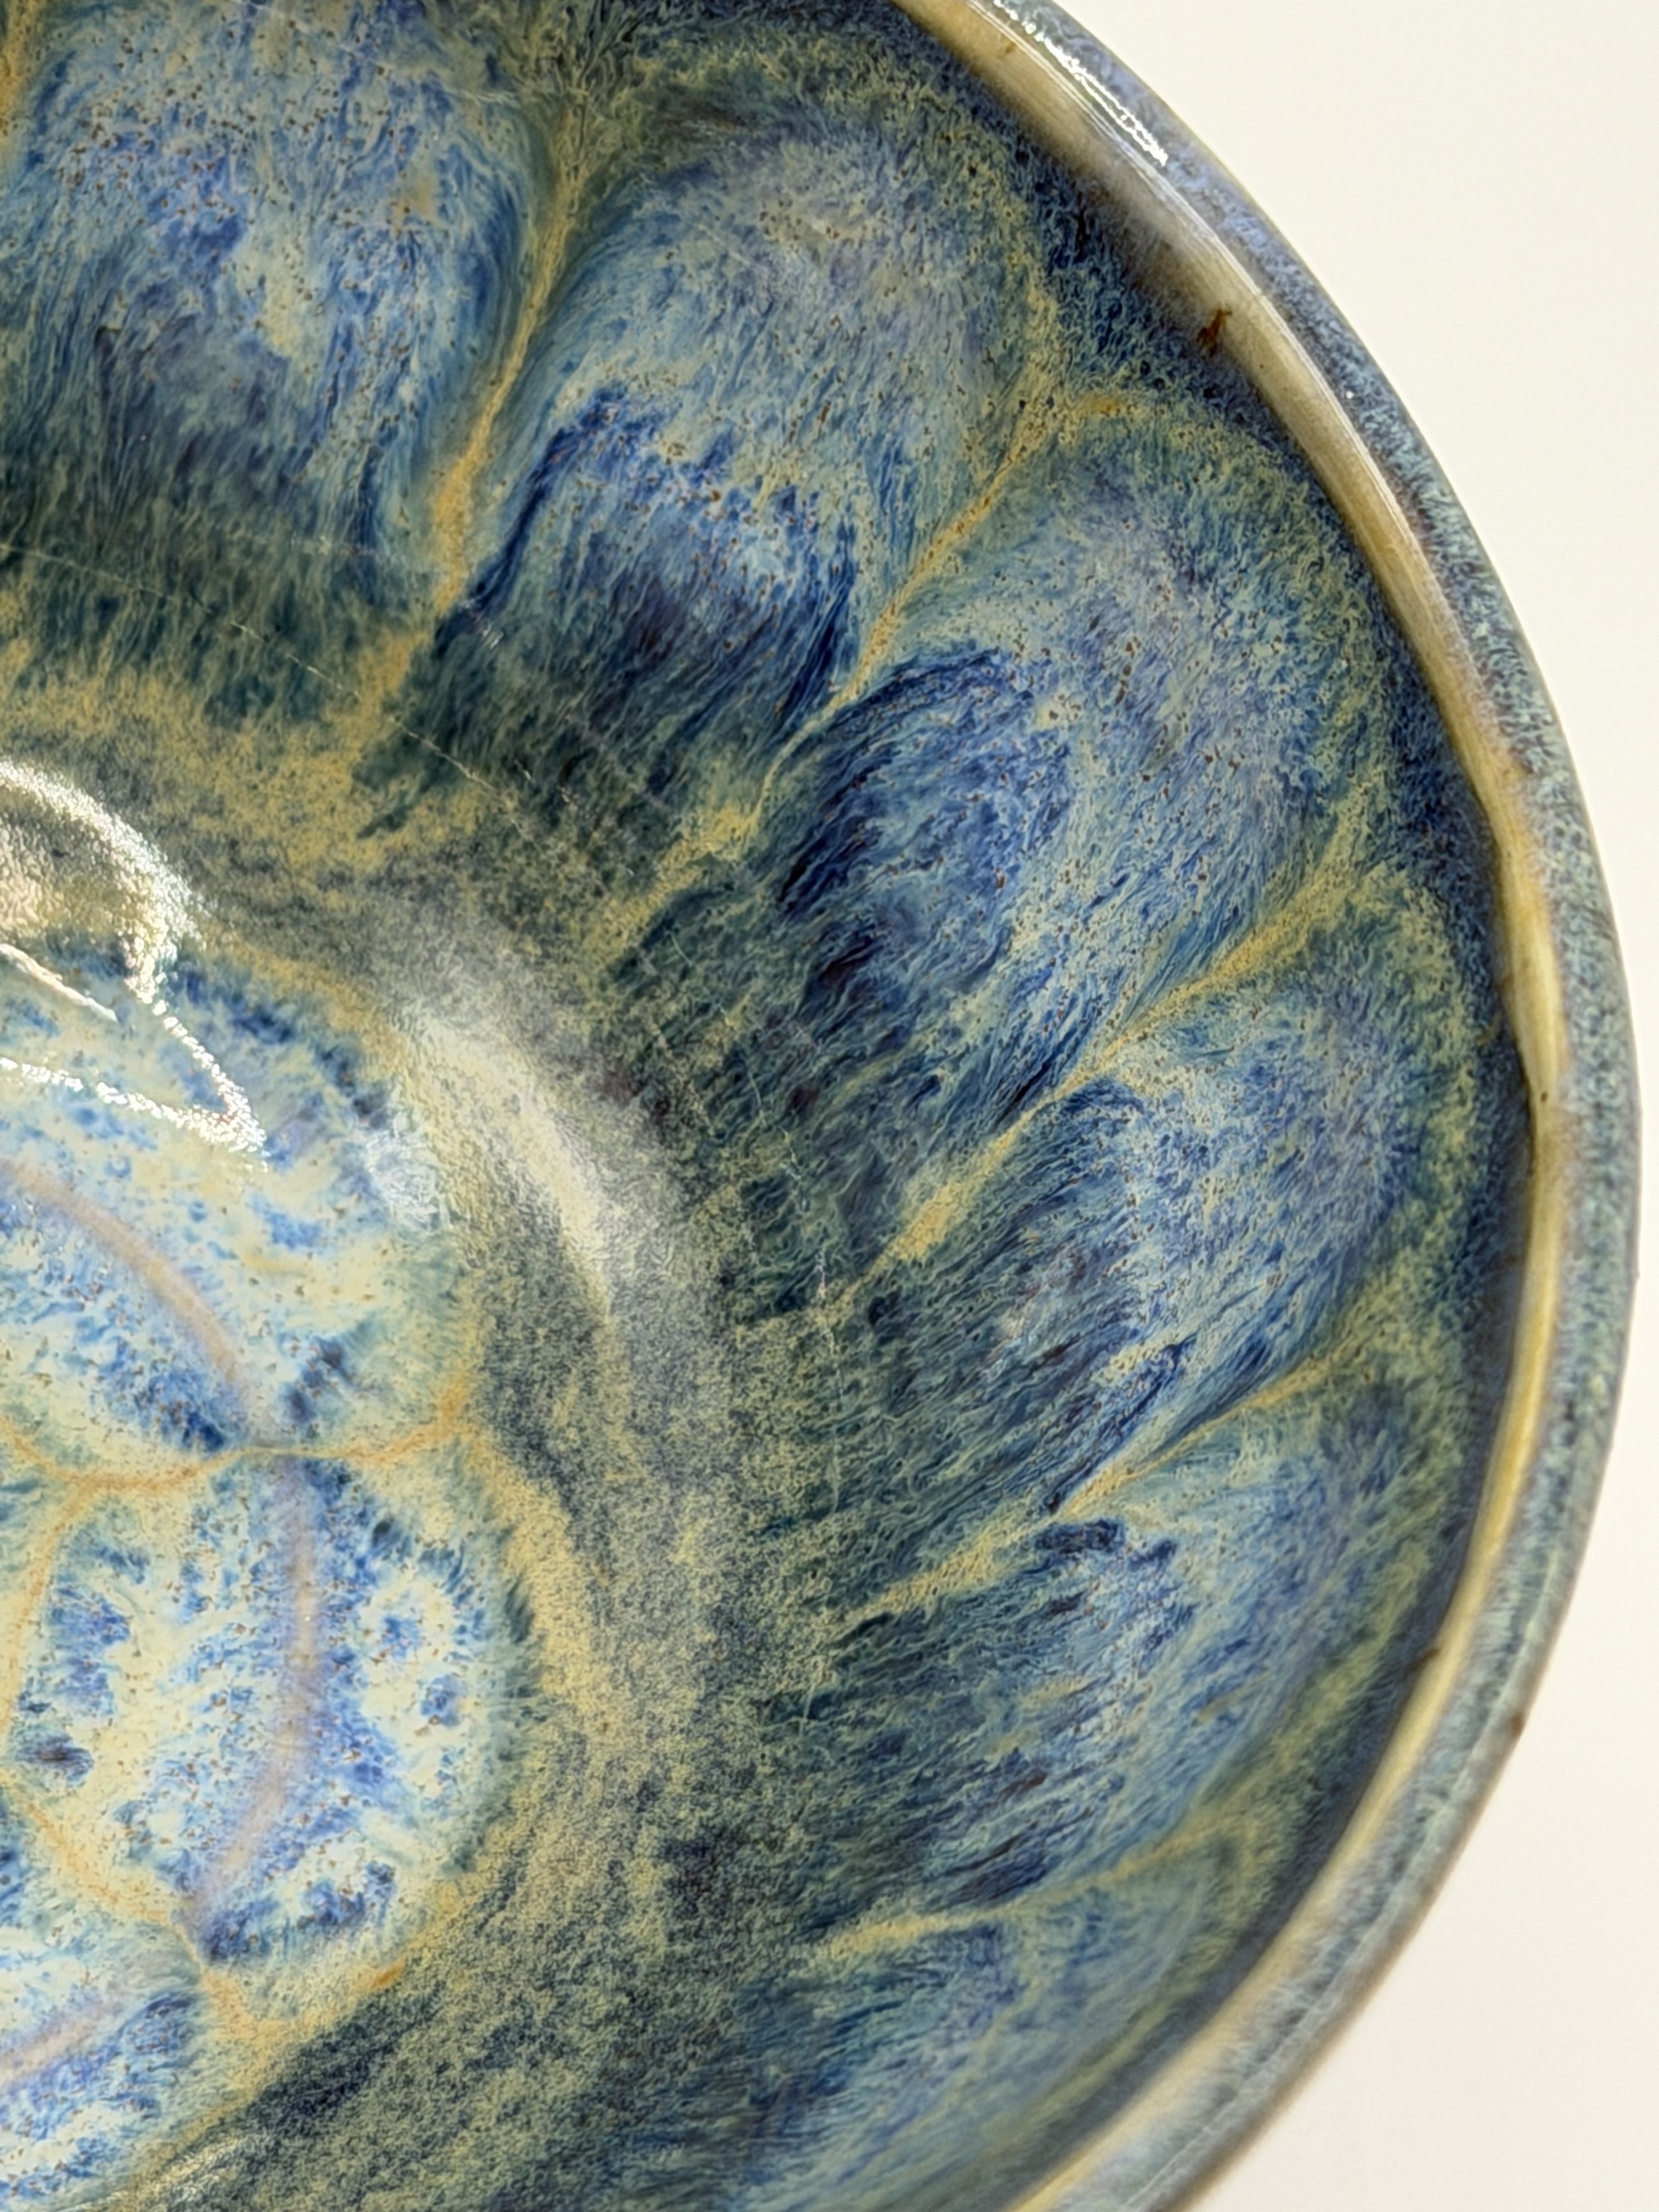
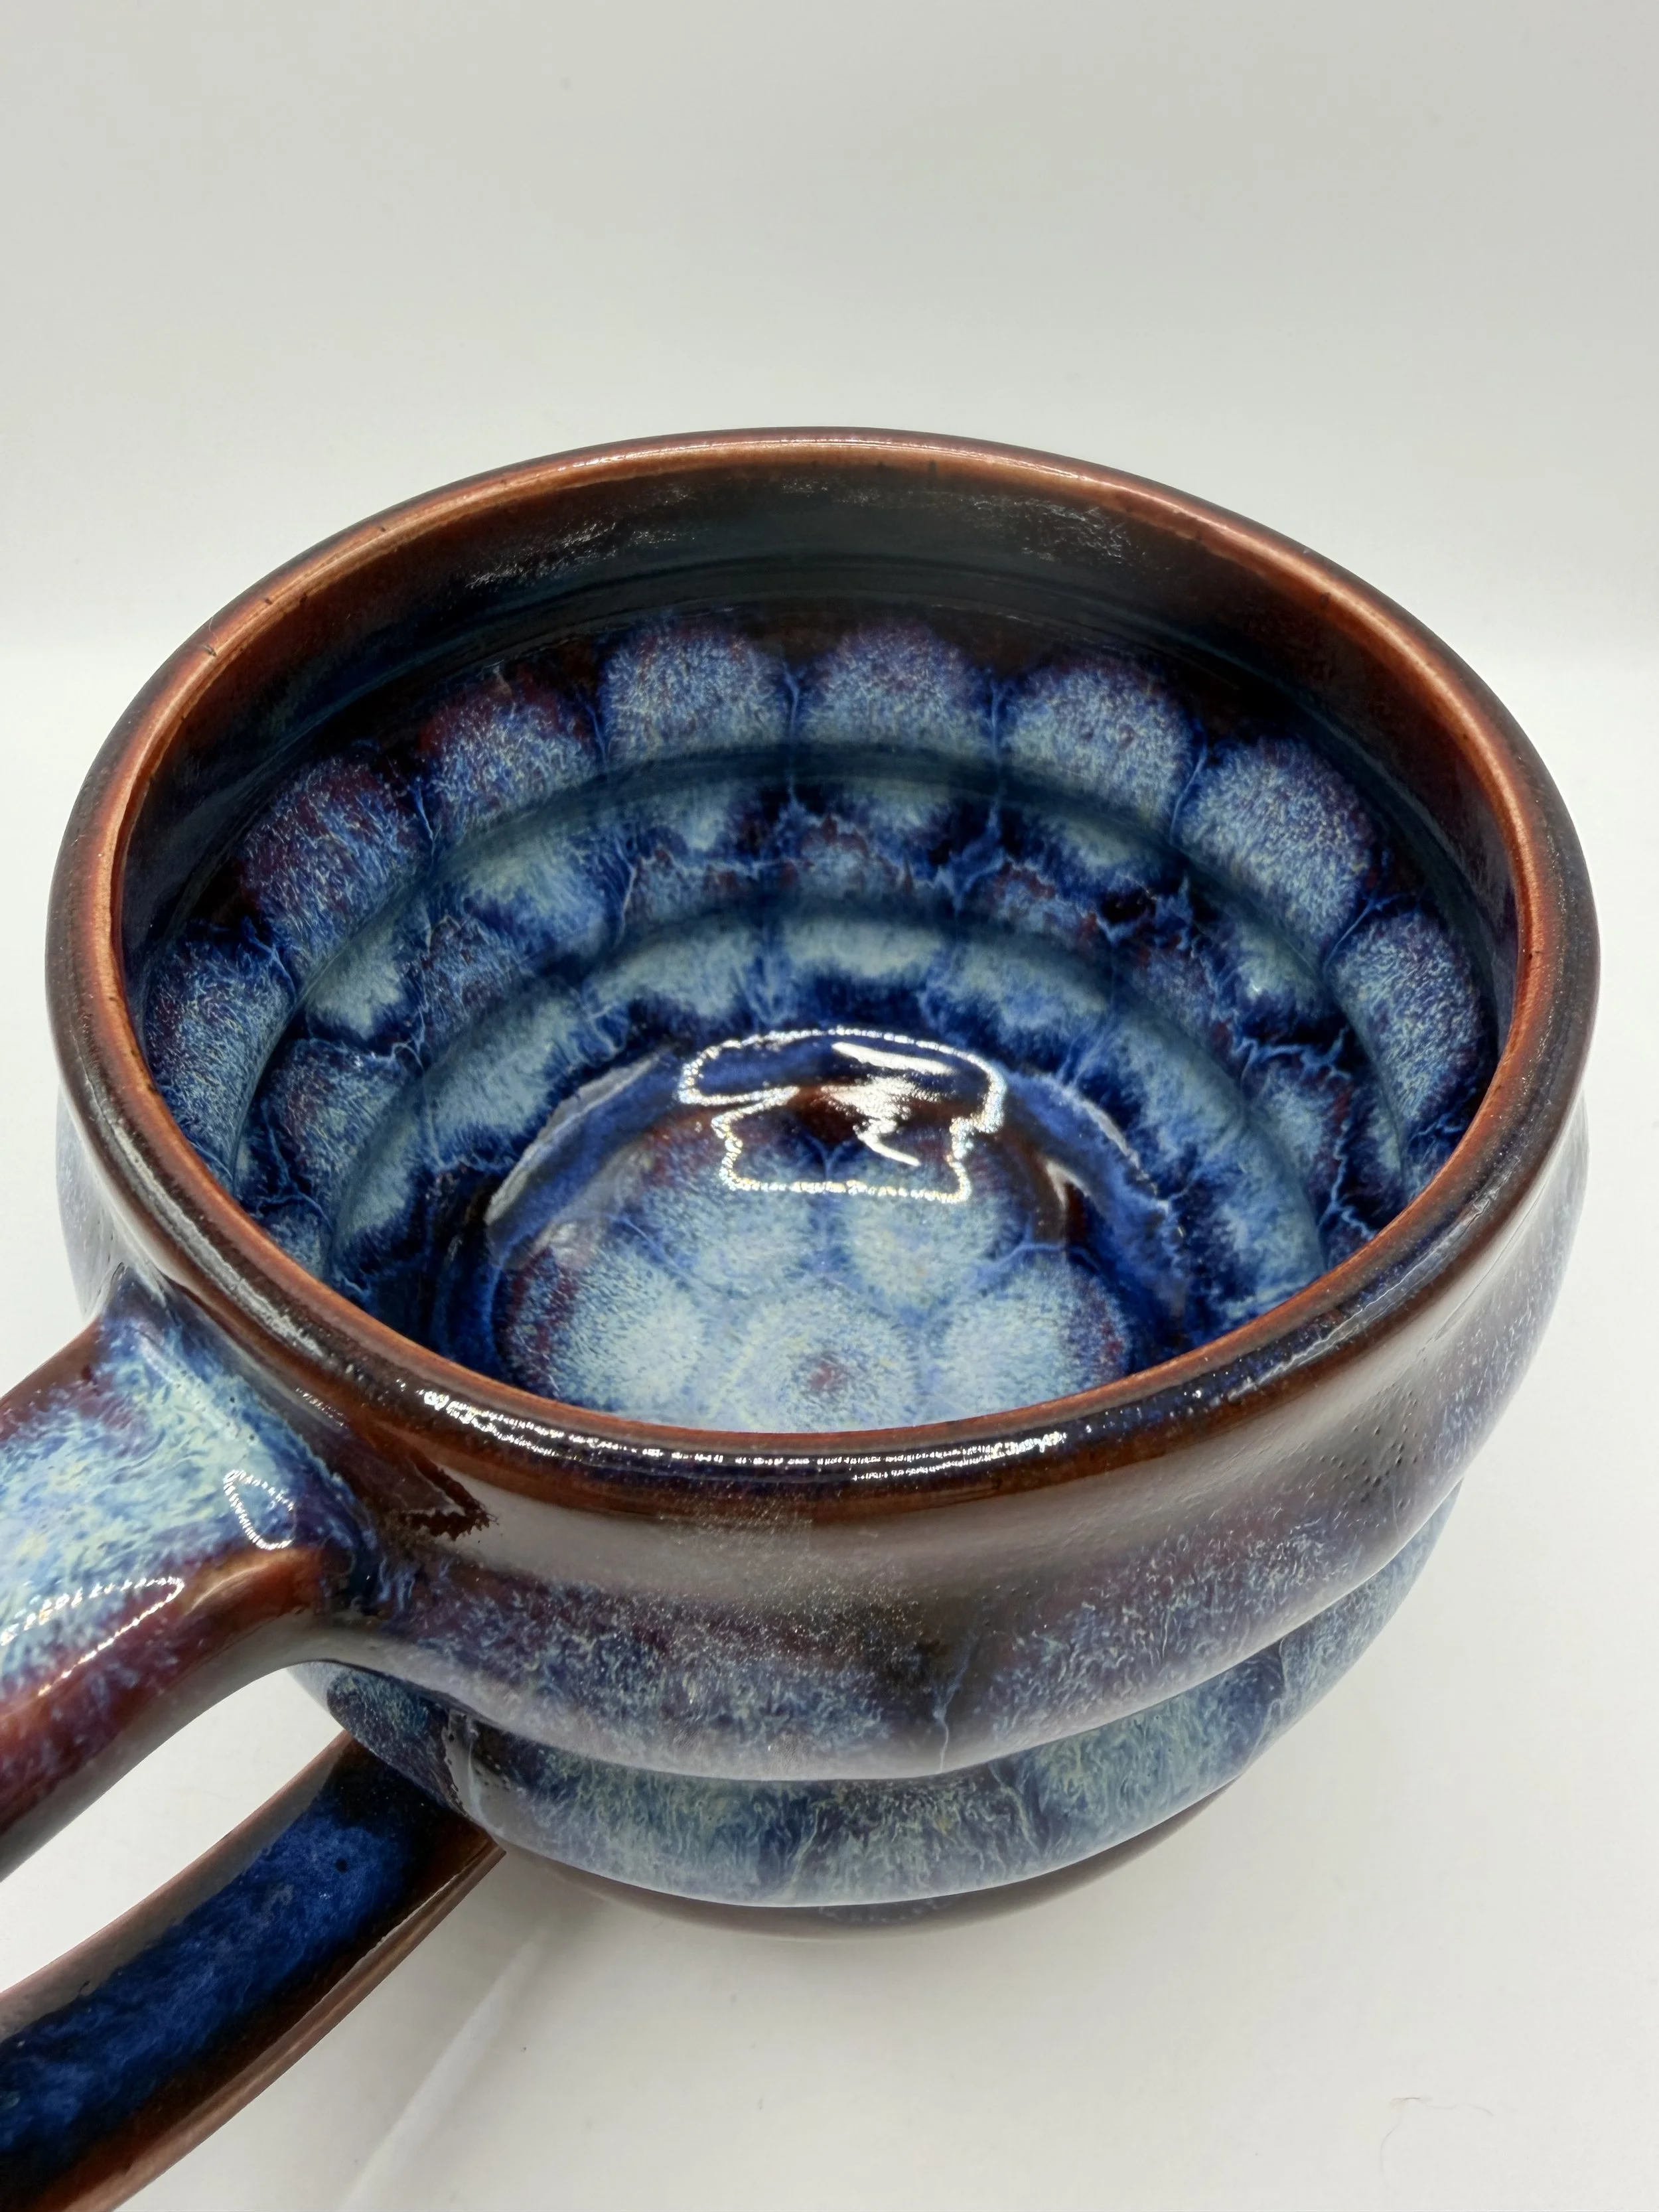
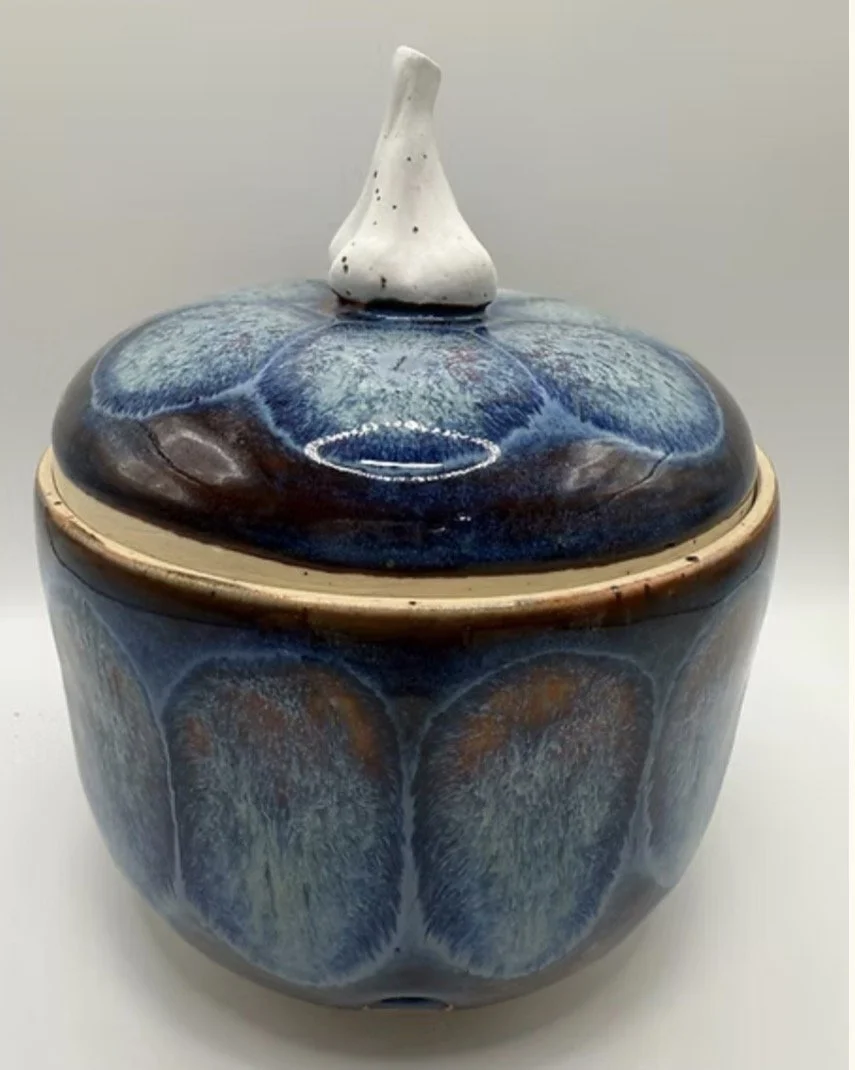
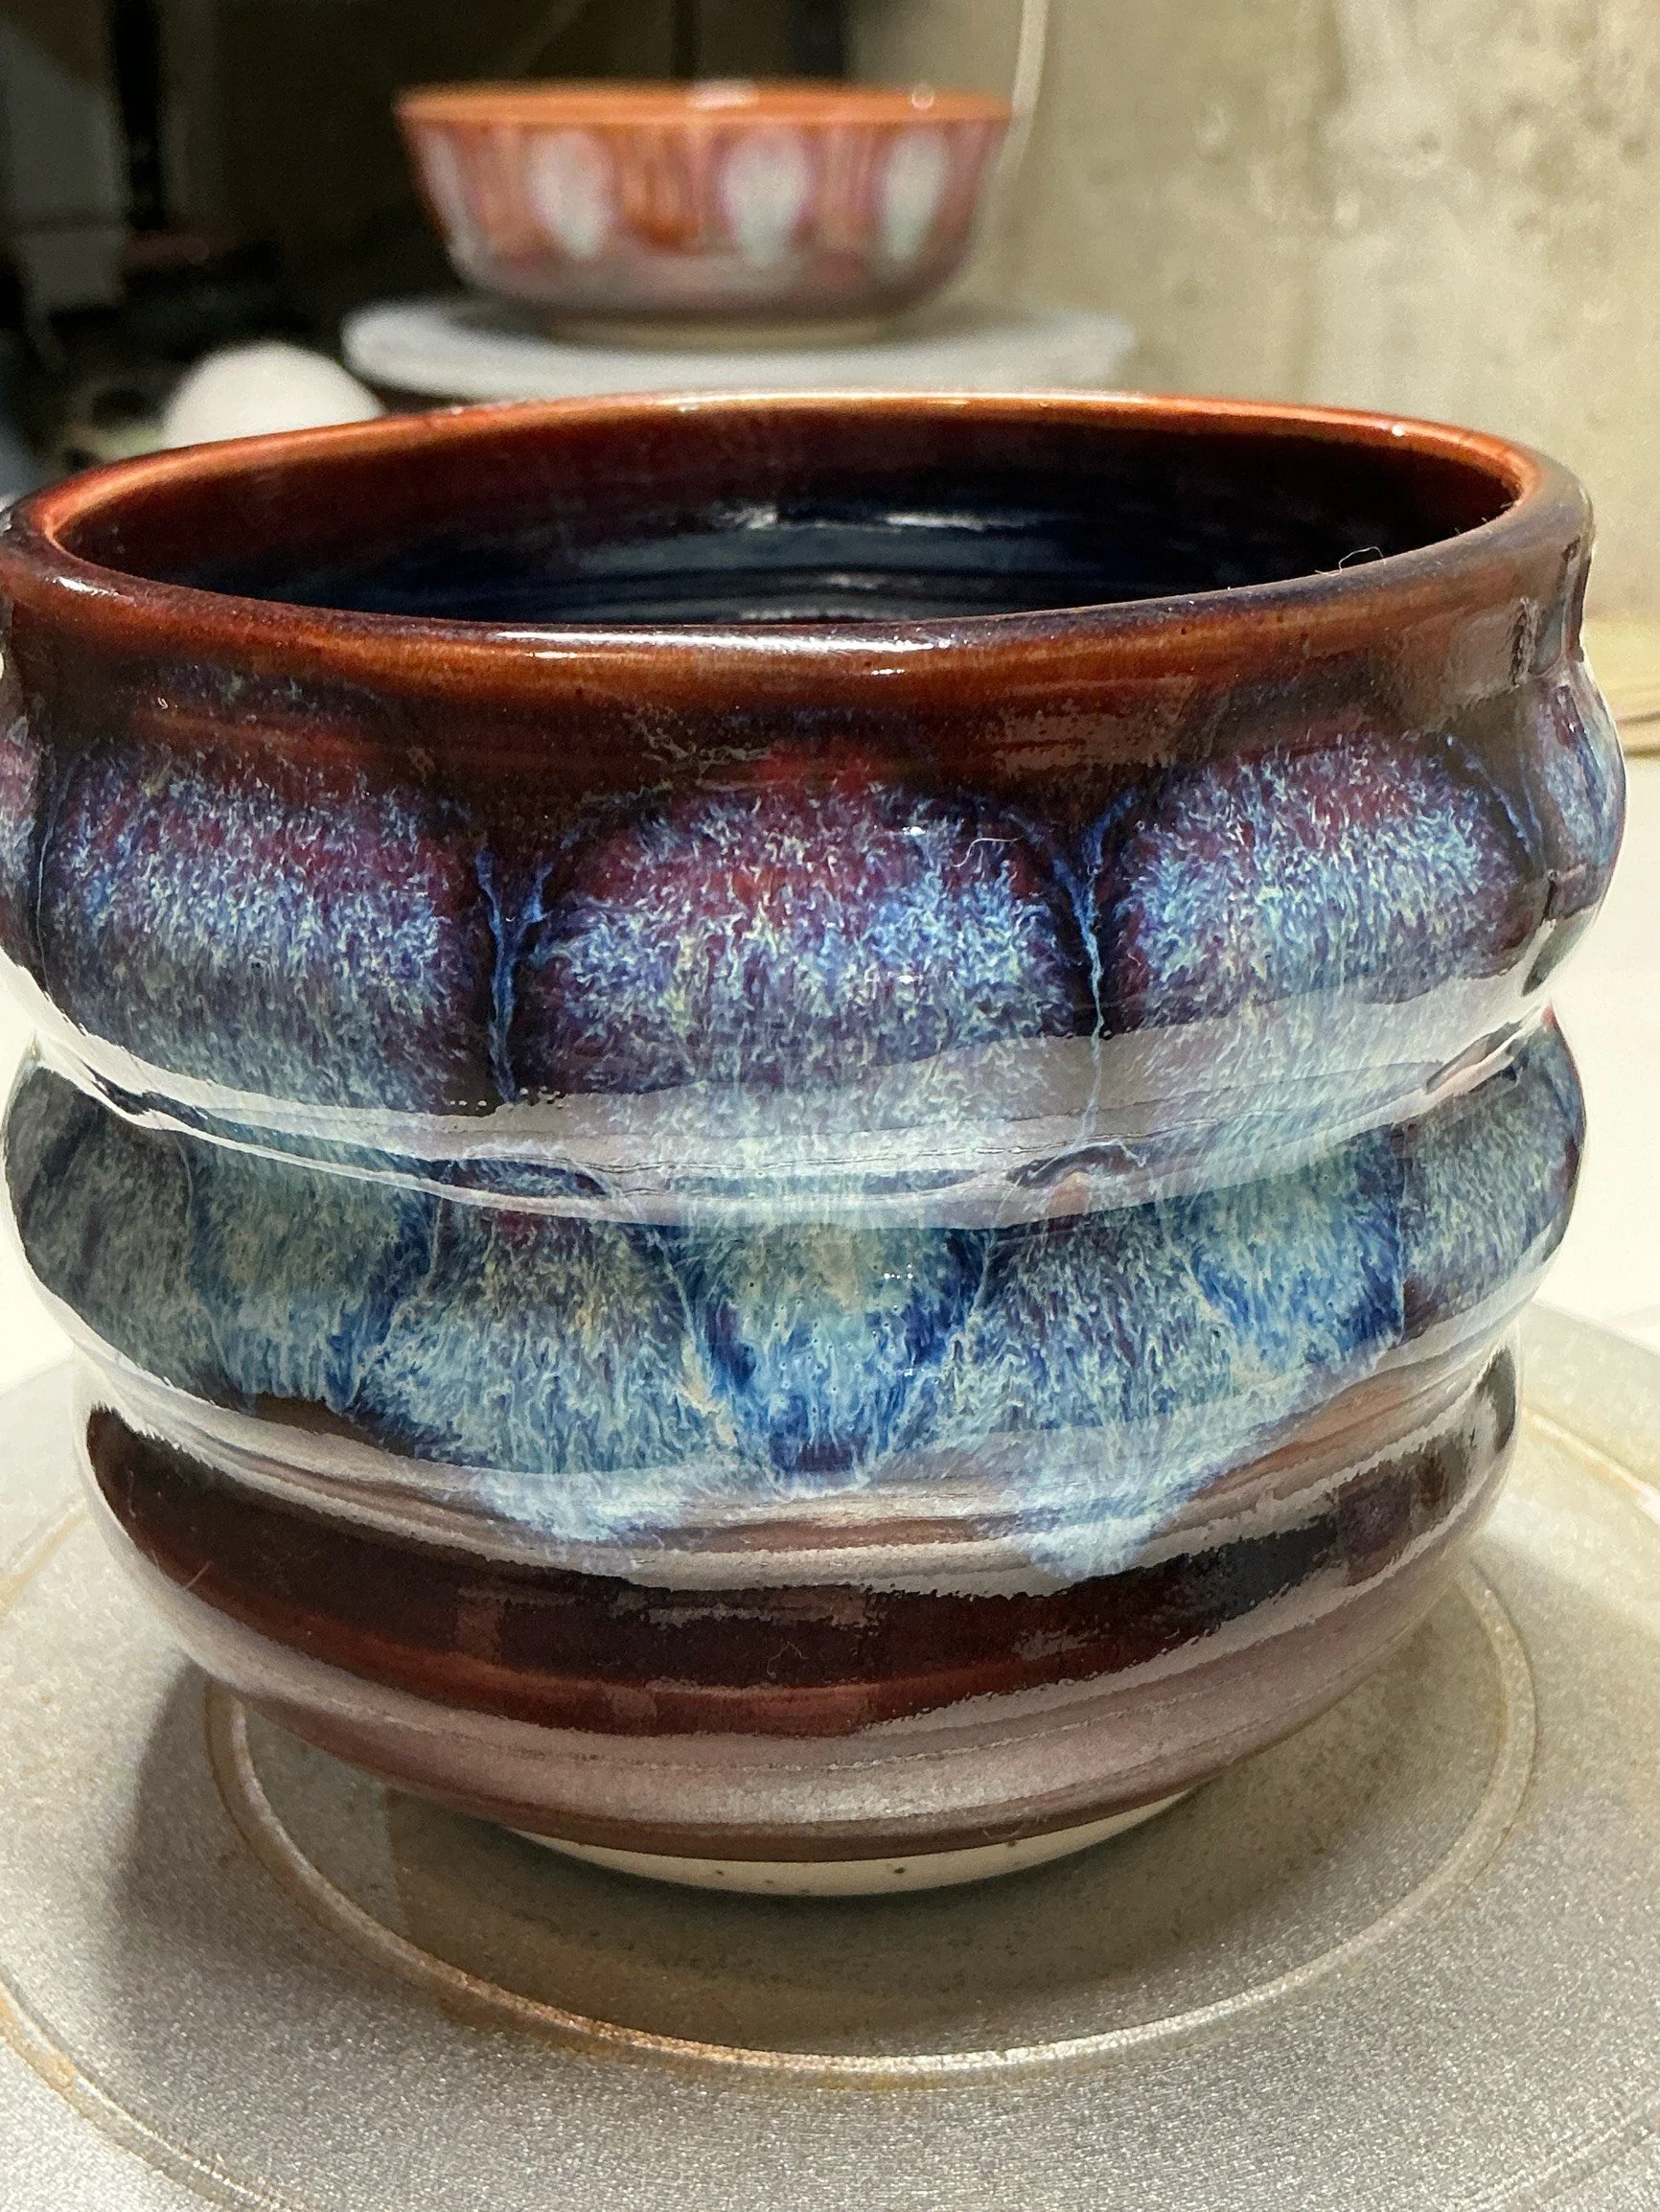
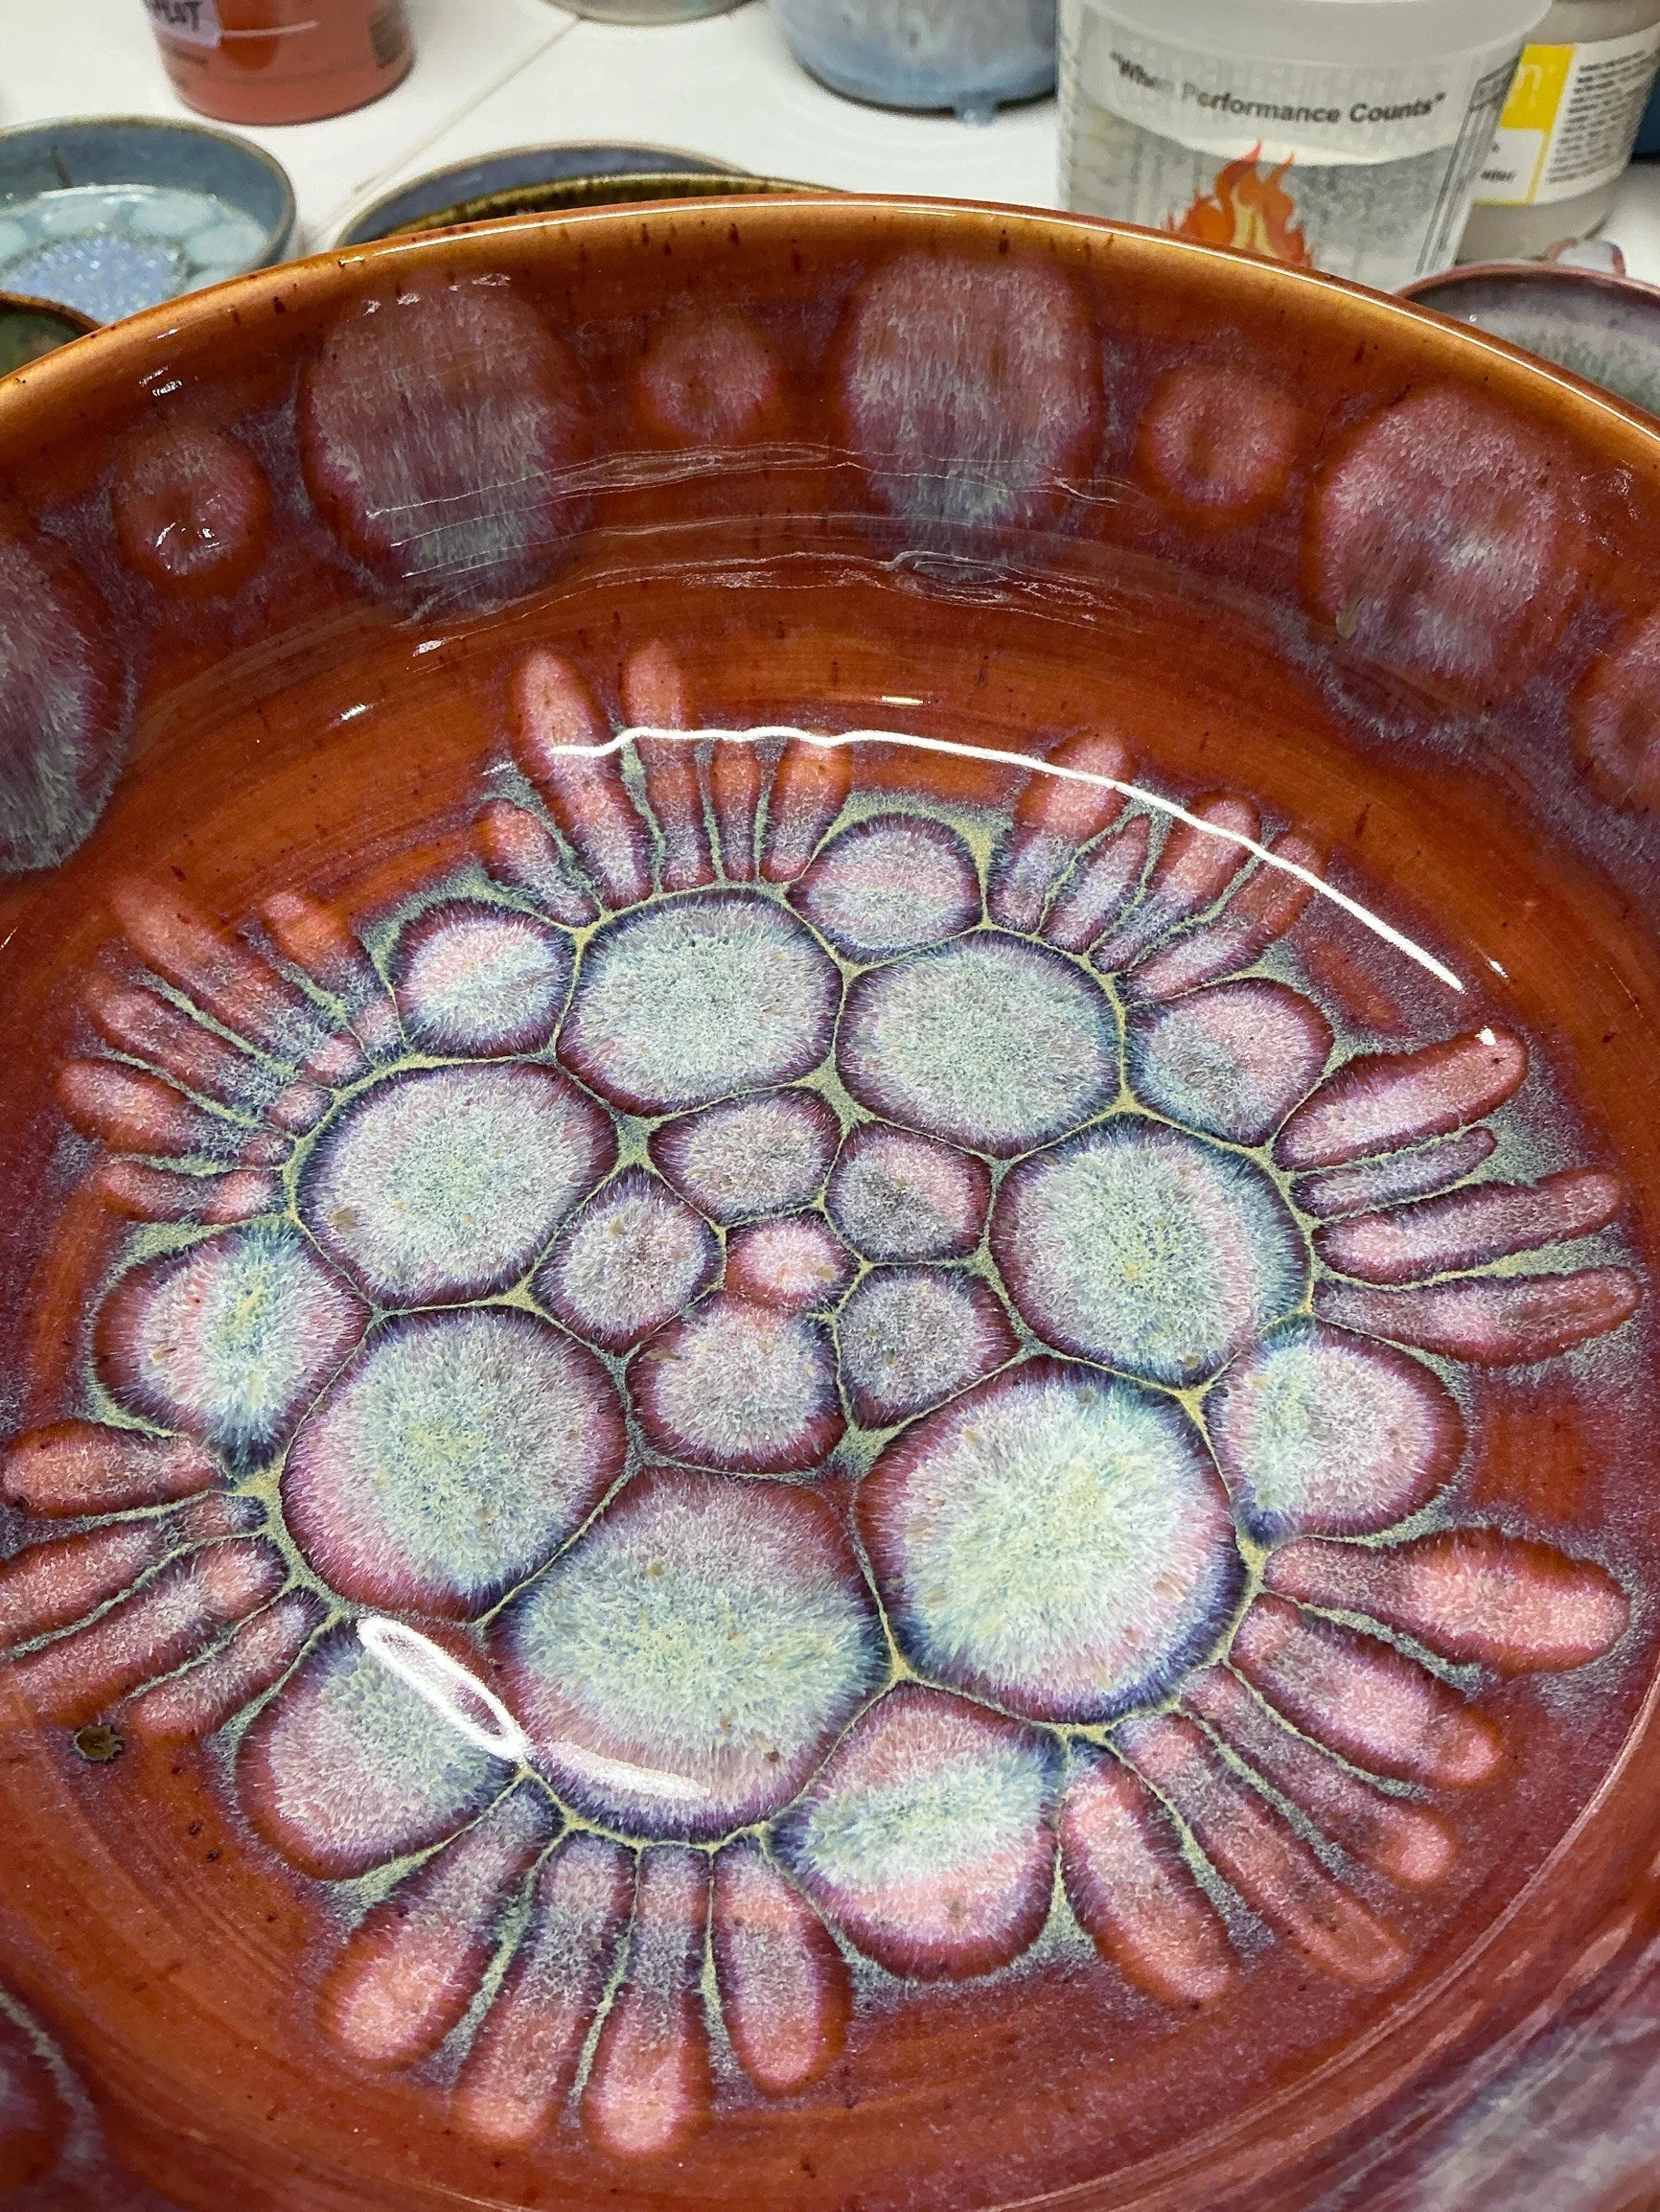
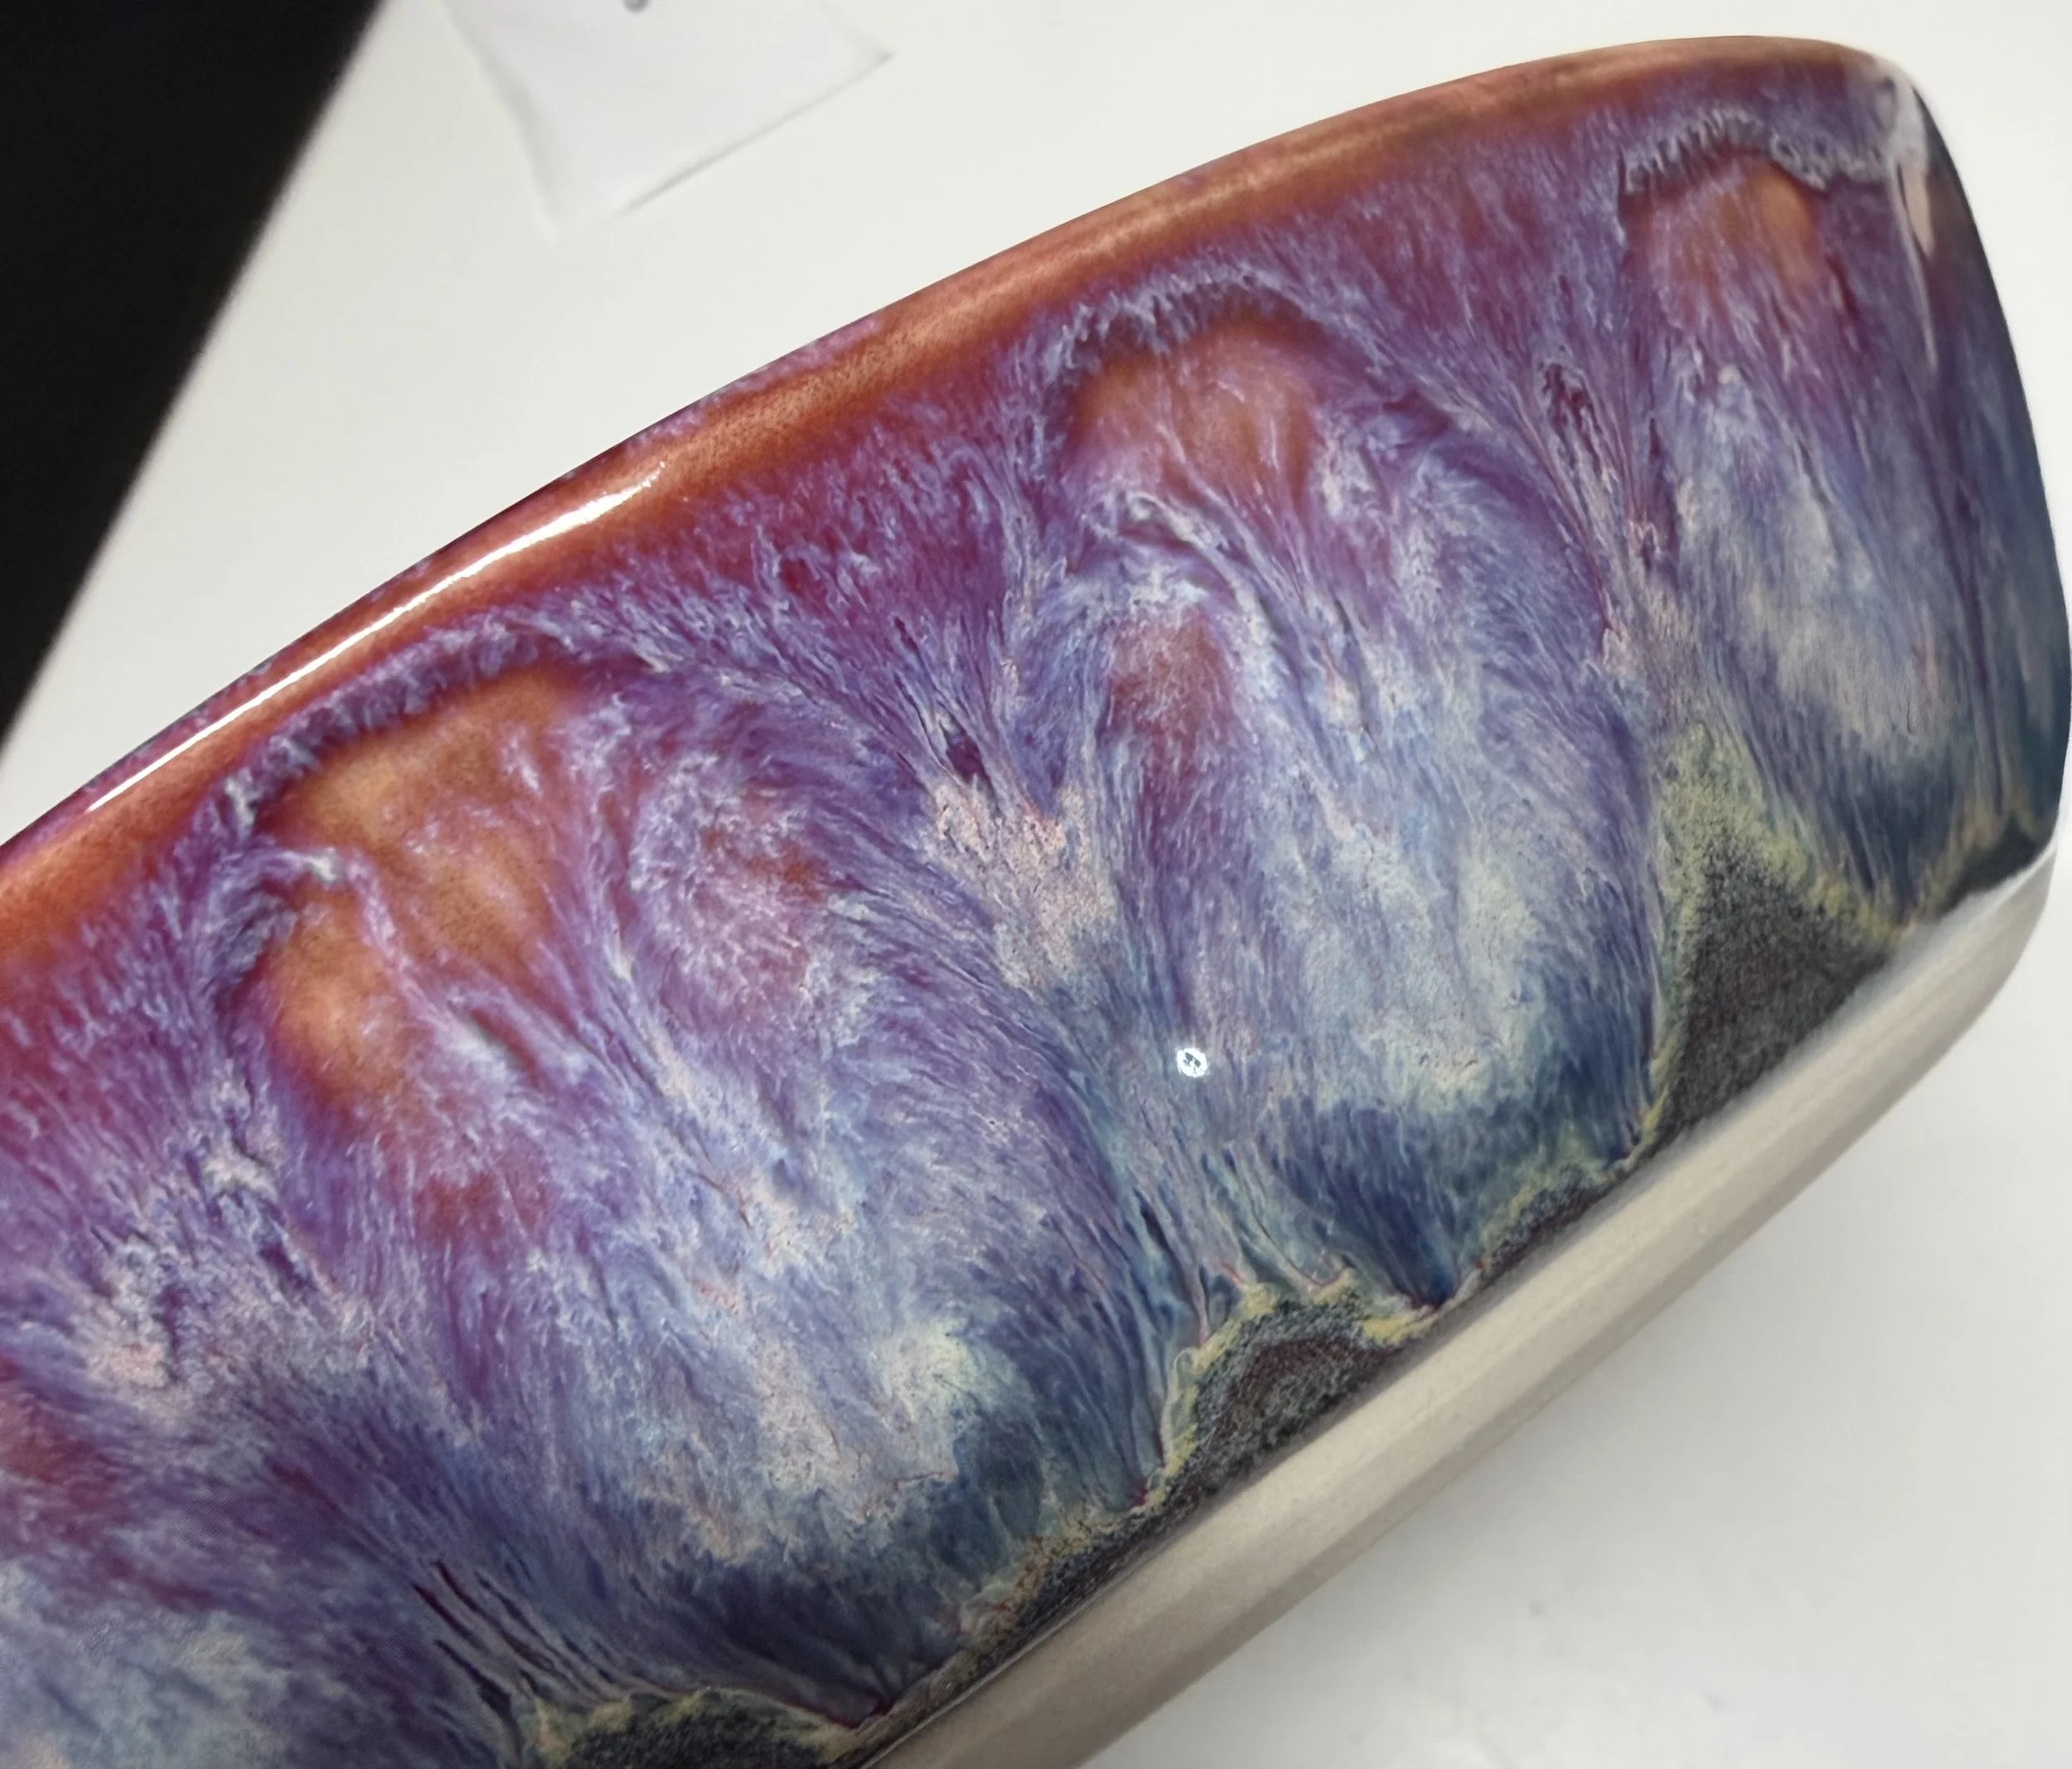
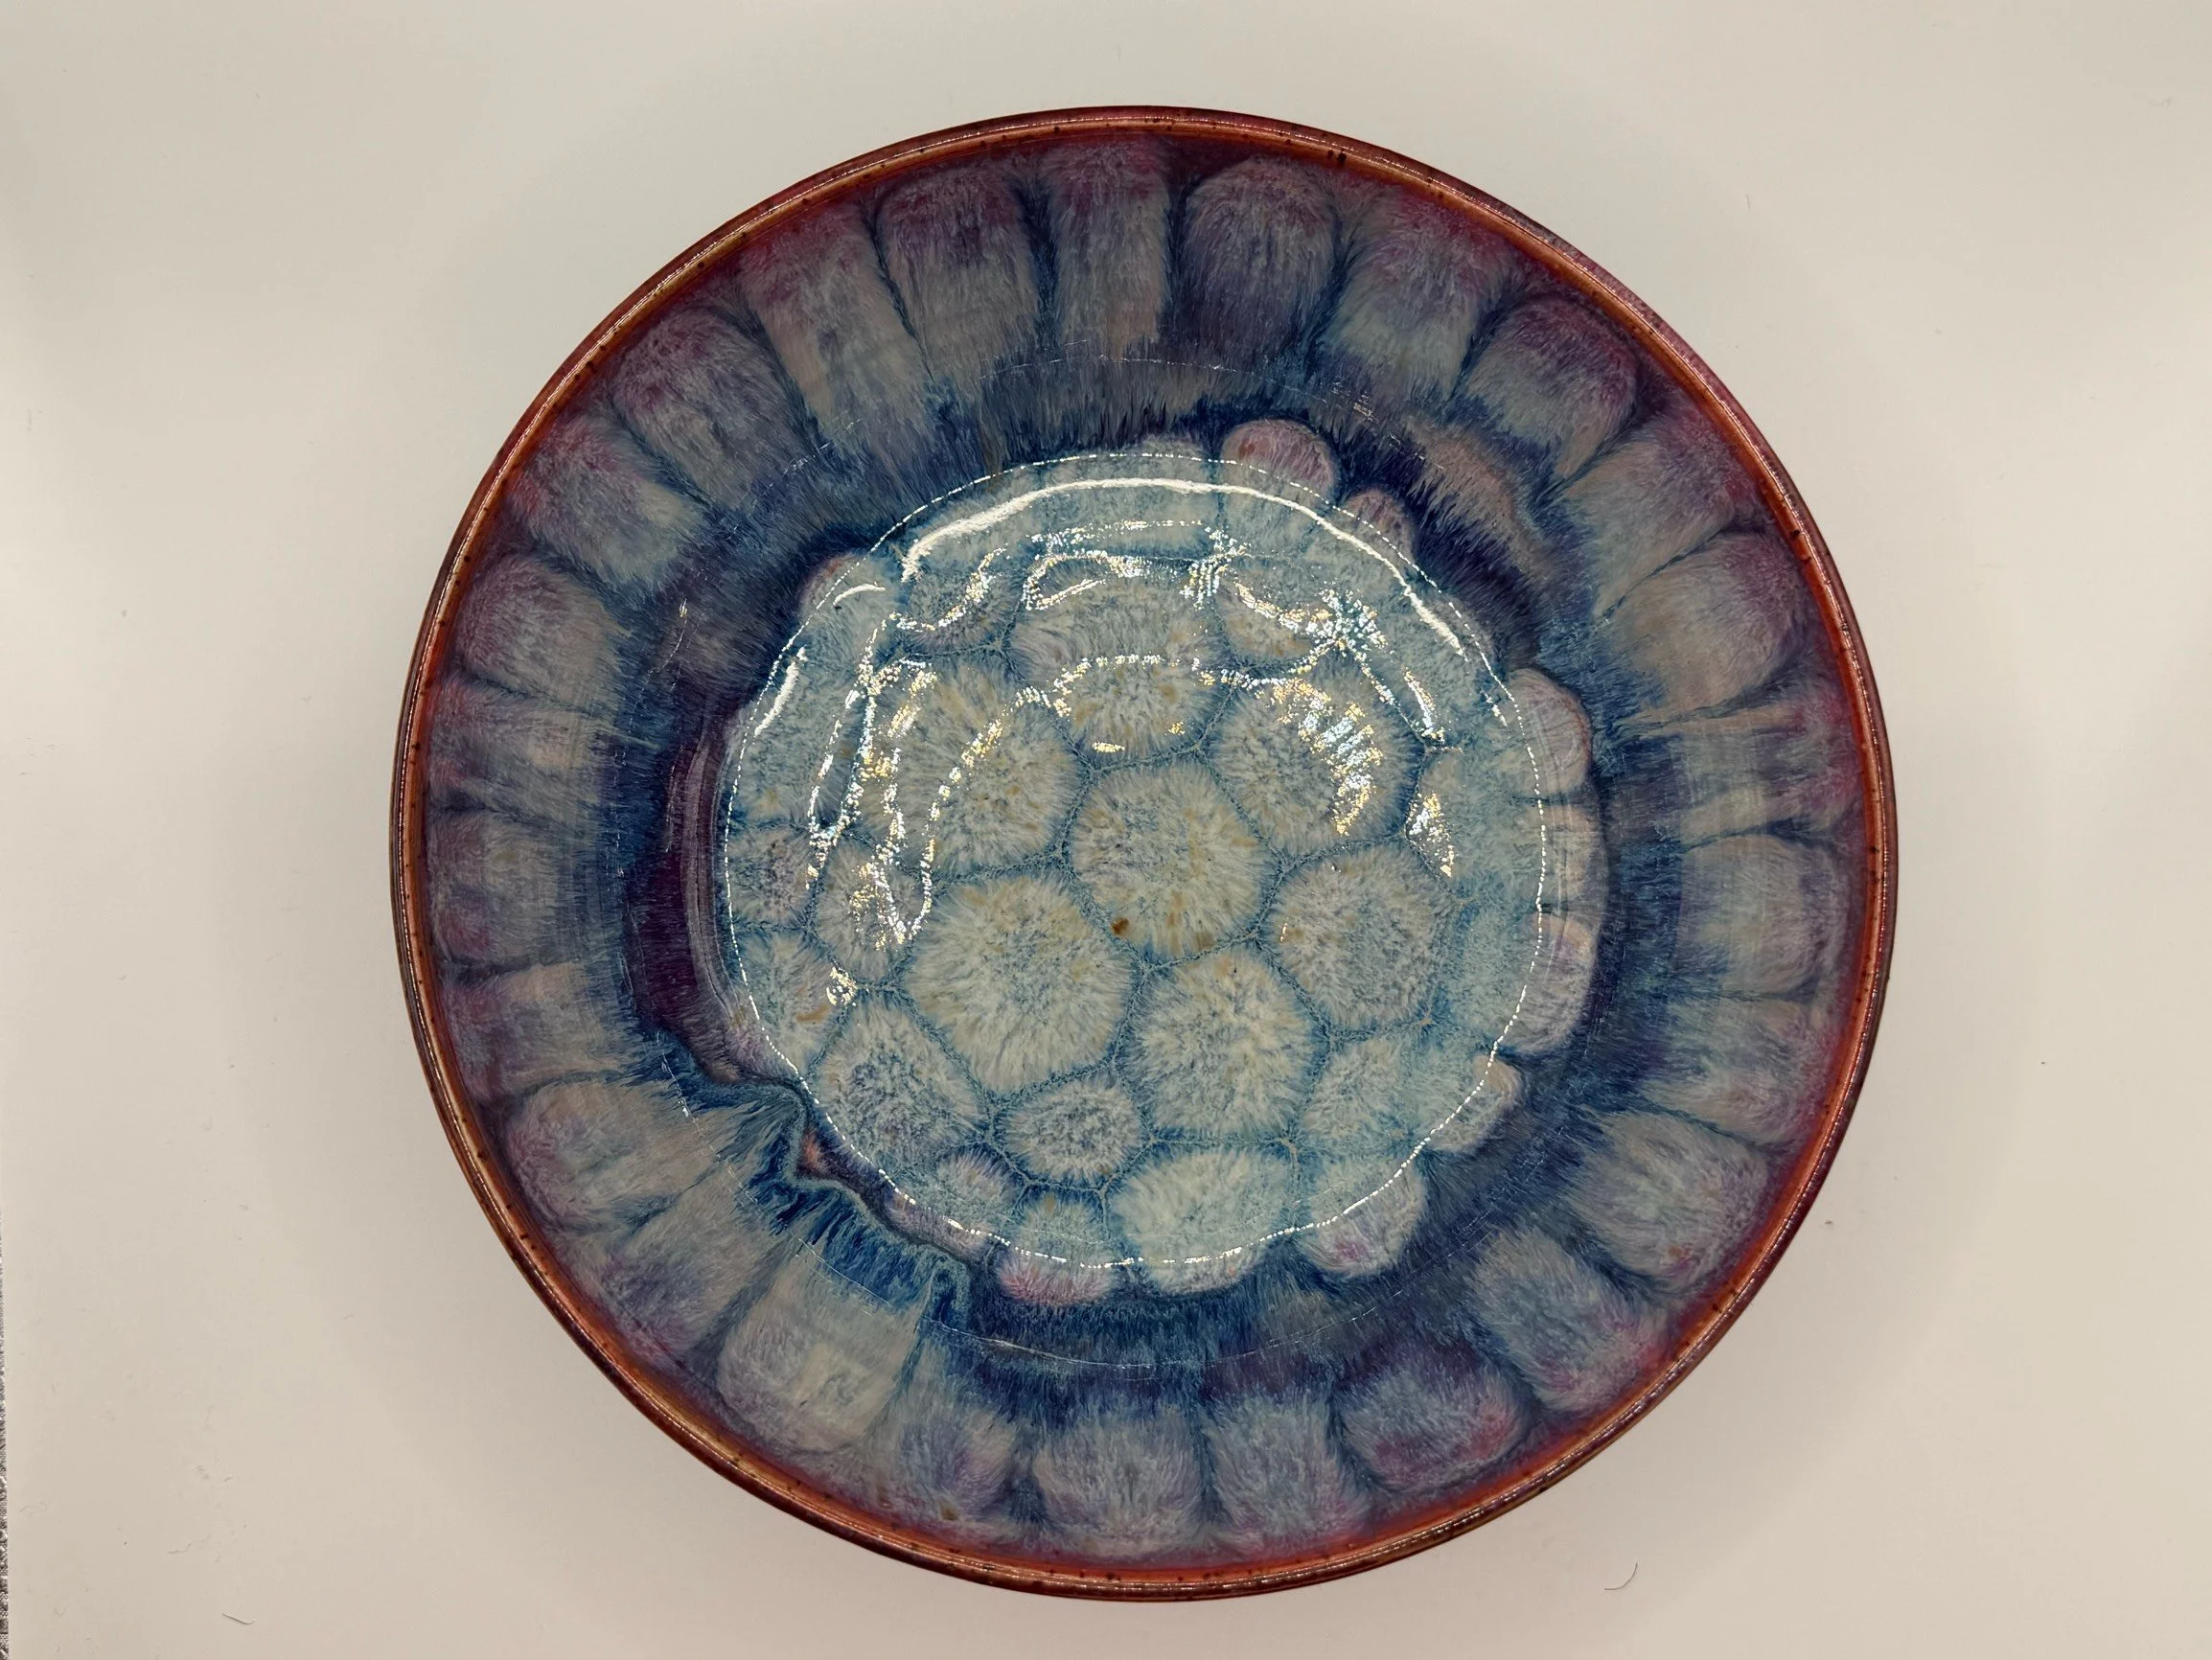
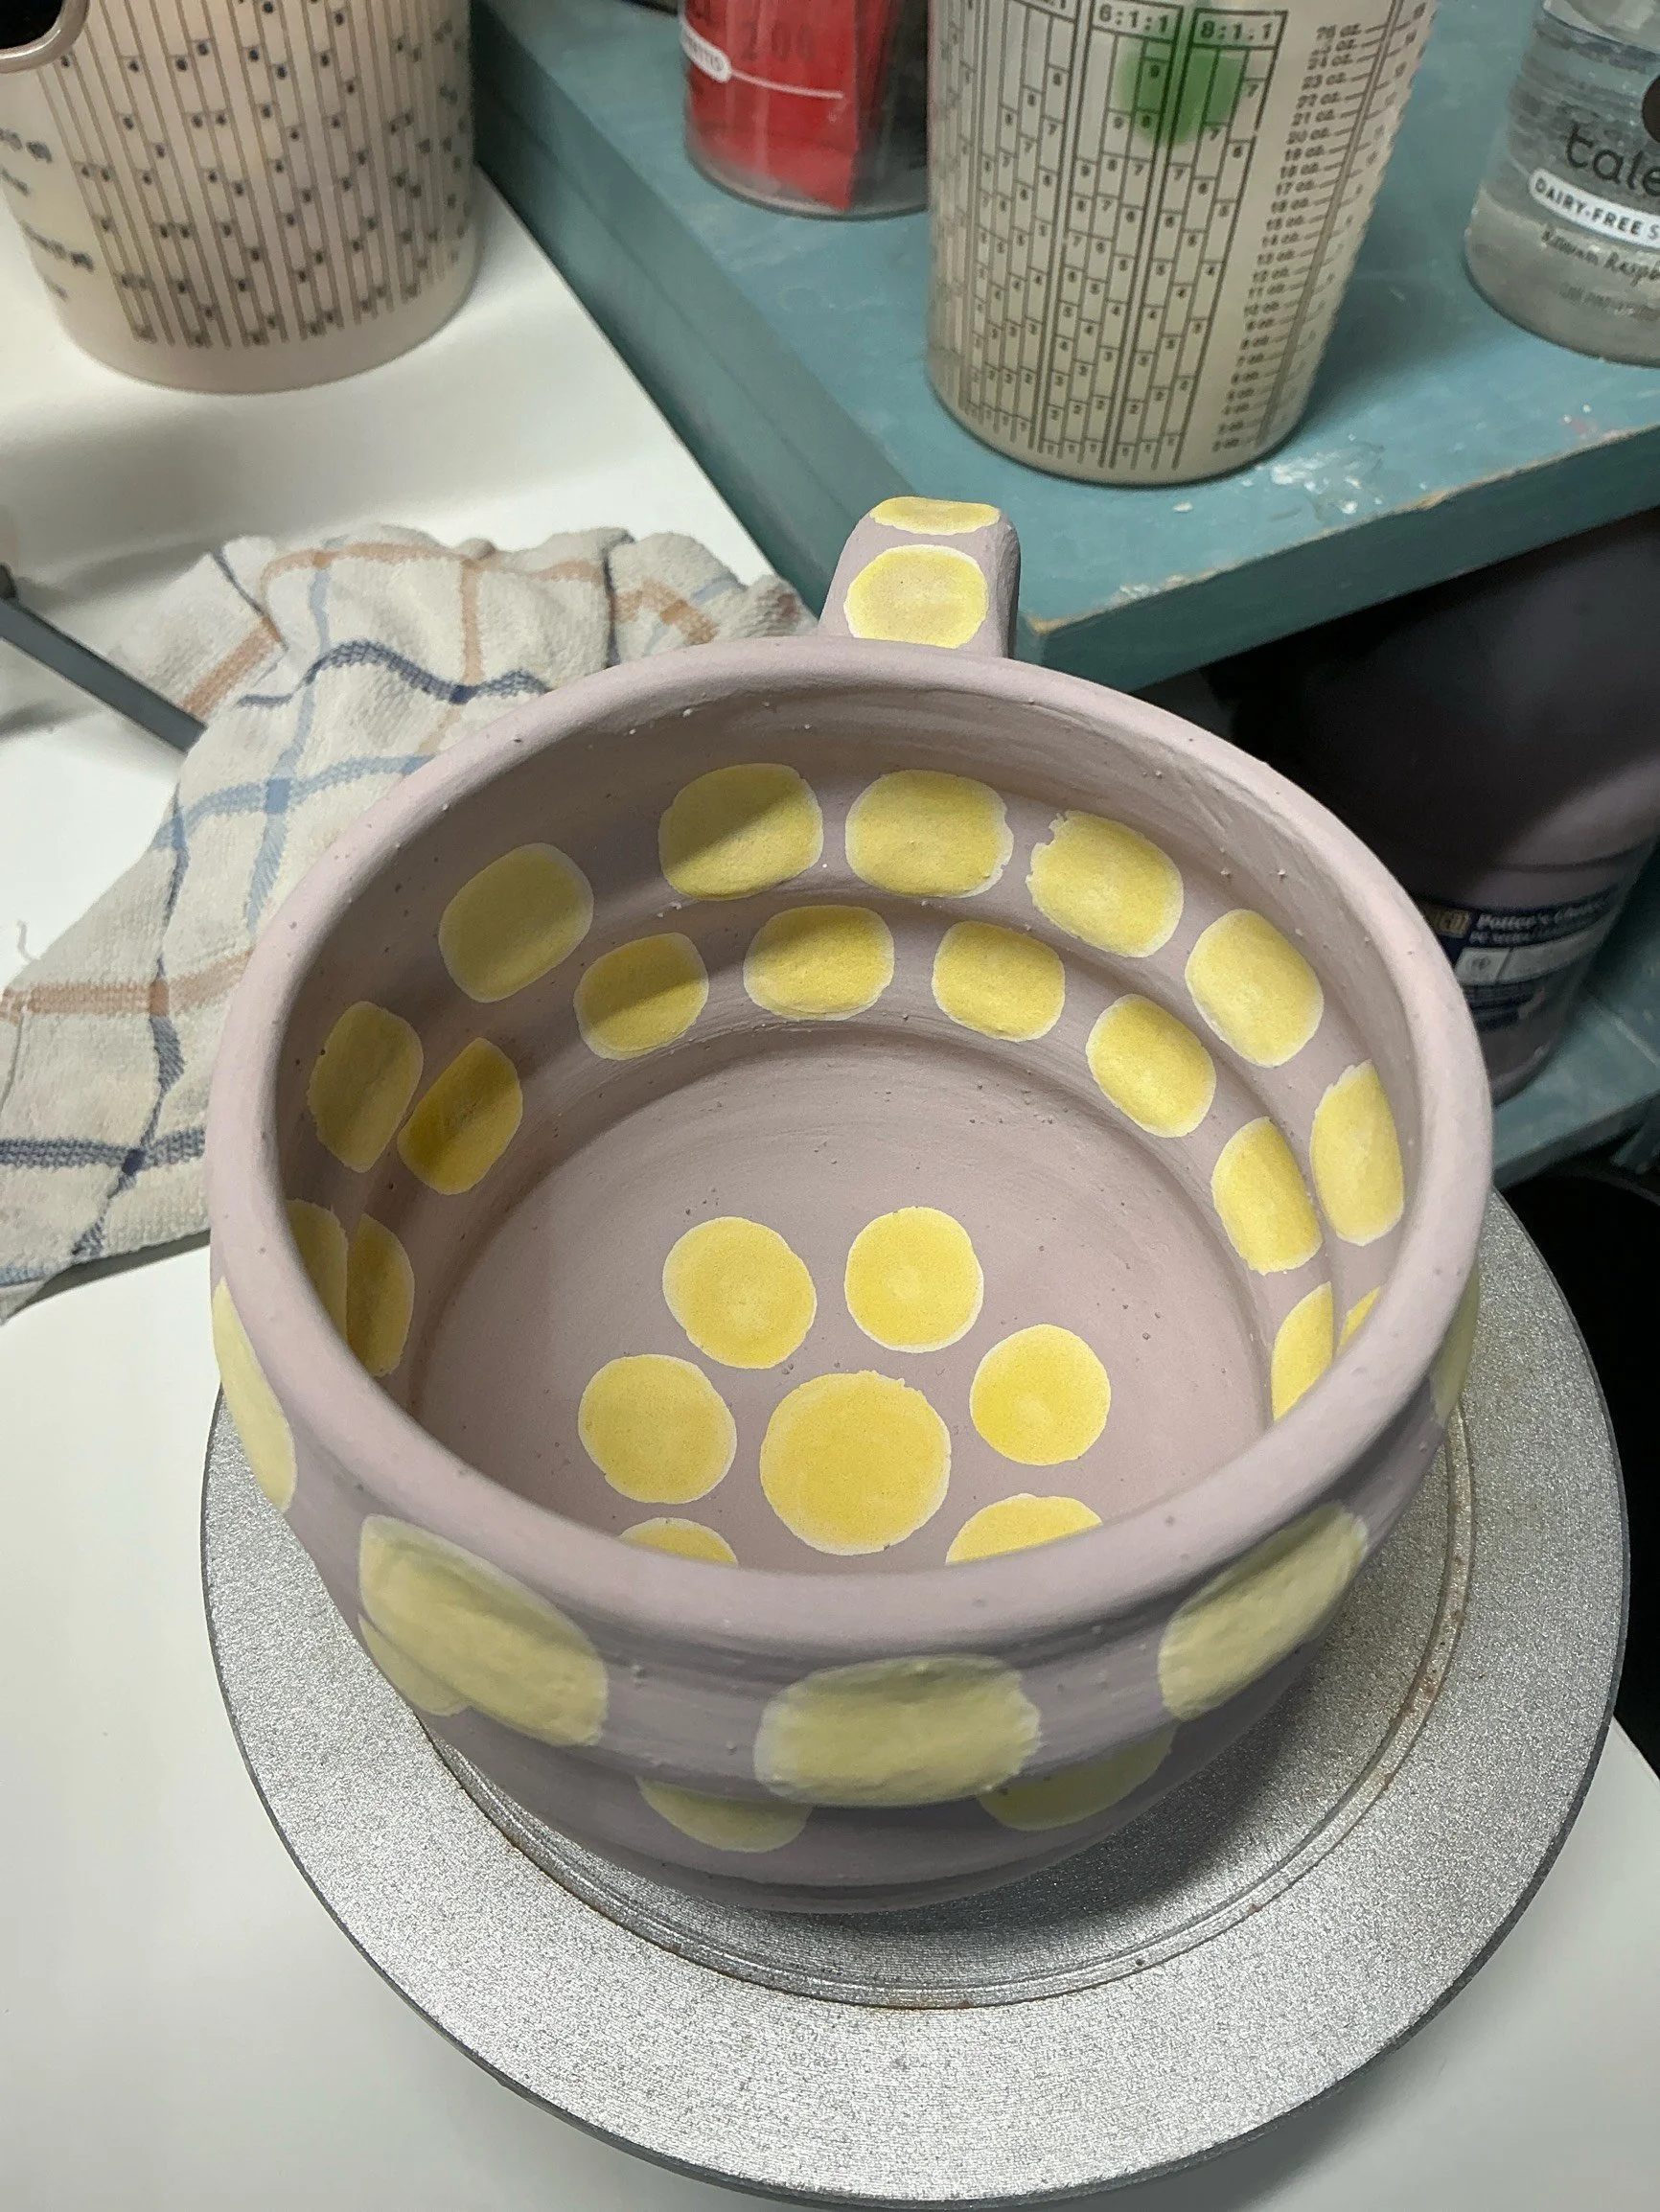
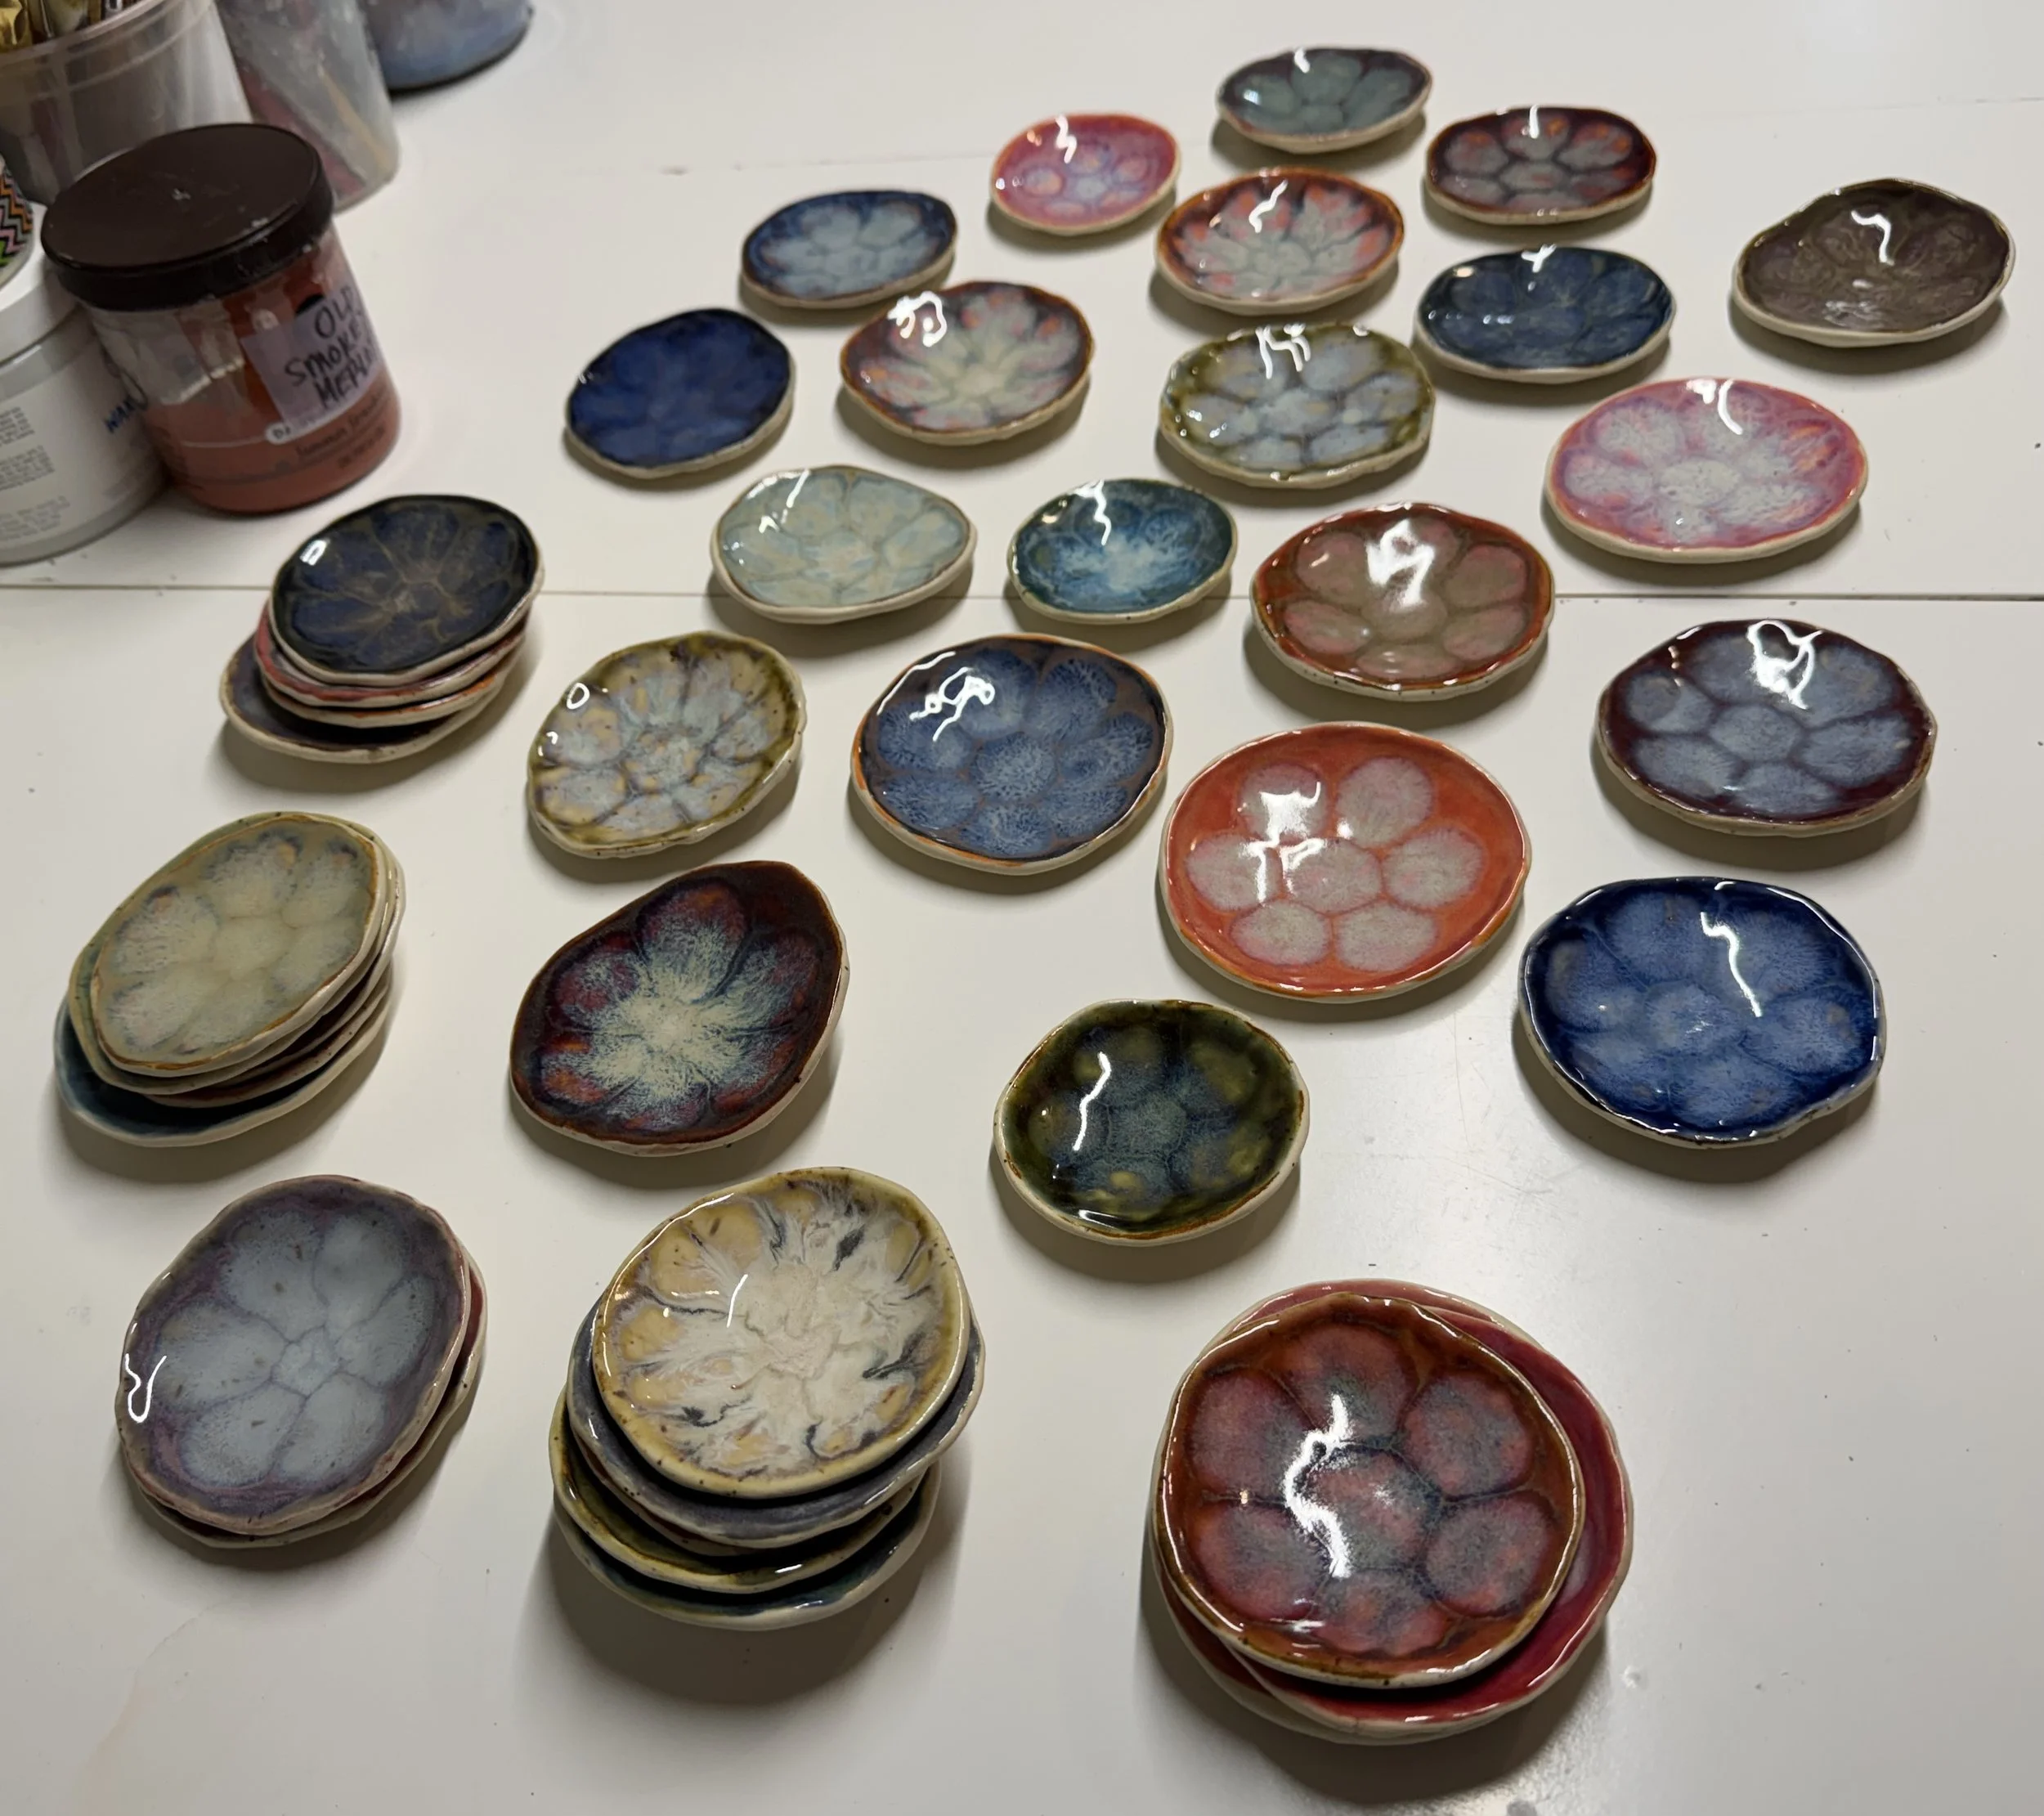
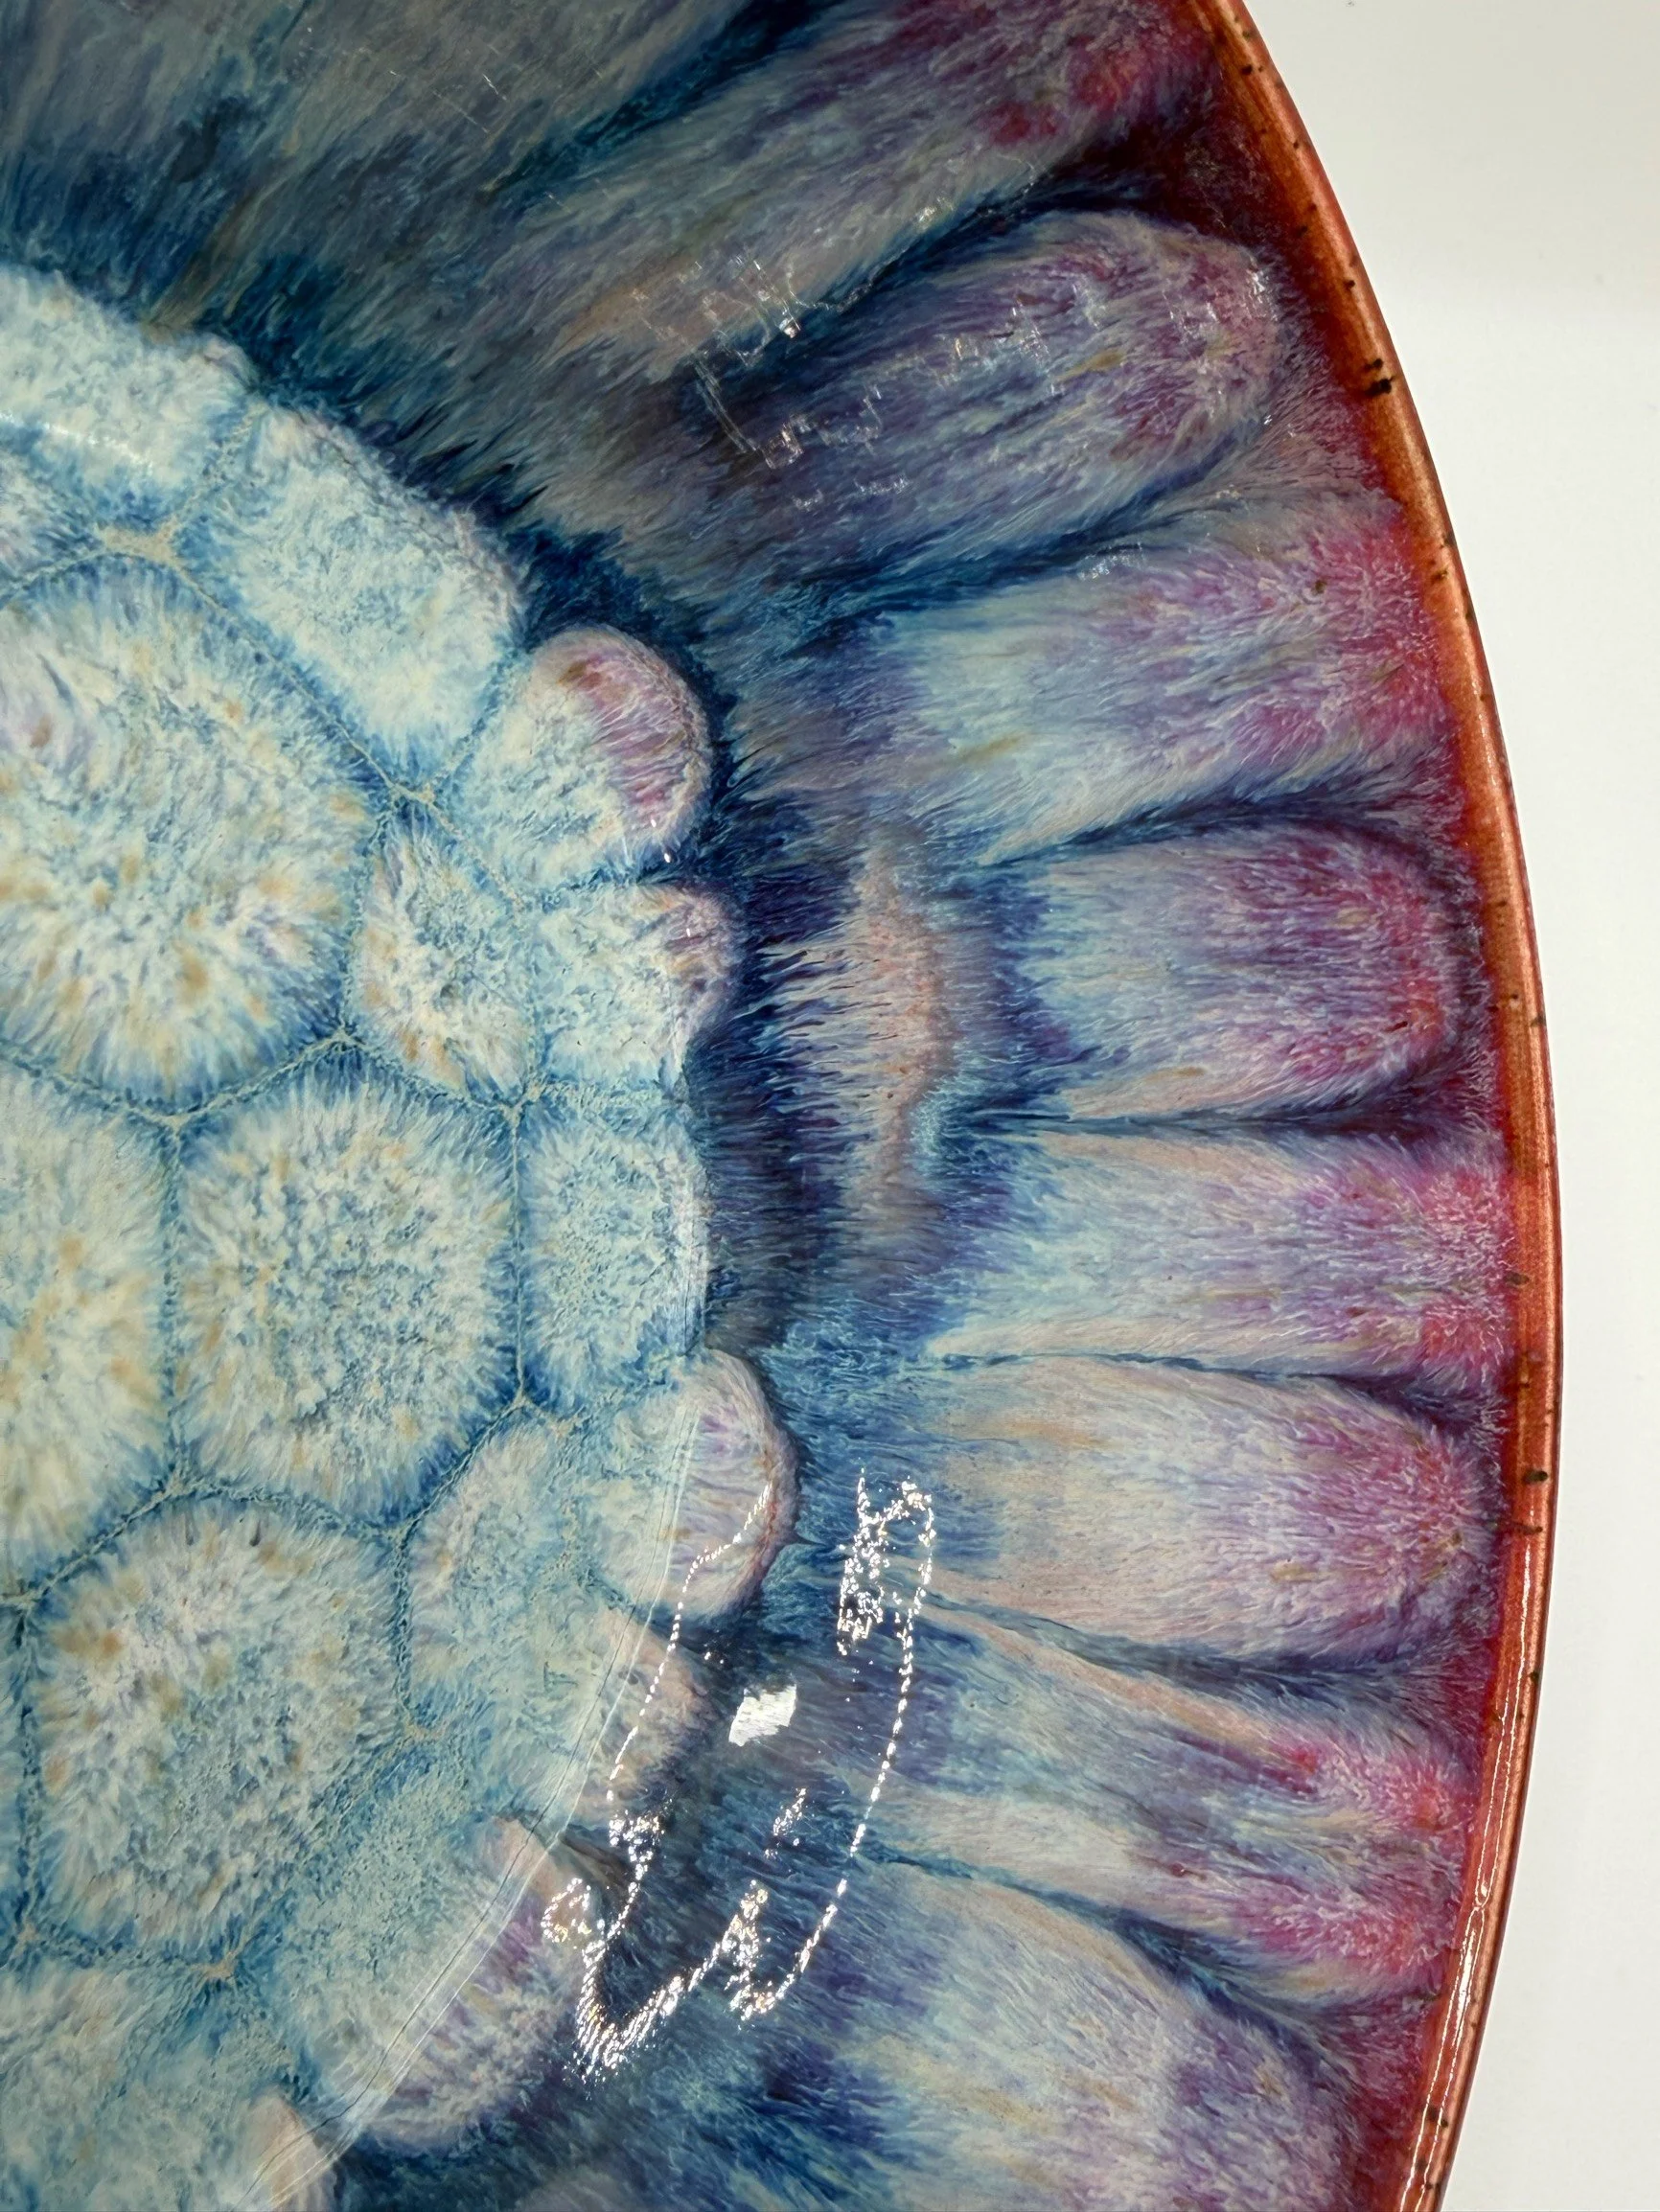
This glazing technique’s appeal is clear: vibrant color combinations, mesmerizing pooling effects, and organic, unpredictable patterns.
These images of Danielle’s work say it all, I think:

Danielle’s Glazing Journey to Discovering Frozen Pond
“One of my greatest pleasures in my adventures in ceramics,” says Danielle, “has been expanding my experimentation of glazing.”
Like many studio potters, Danielle’s early glazing involved simple dips and hopeful fingers crossed. Results were often unpredictable, sometimes disappointing.
Years of trial and error led her to take control of her glazing process, recording each variable and gradually refining her craft.
How to Take Control of Your Glazing Process
Danielle emphasizes the importance of tracking your materials and methods:
Clay bodies used
Glazes applied
Application techniques (dipping, layering, brushing, order of layers)
Firing schedules, especially once she had her own kiln
“The process is slow and requires patience—completing the feedback loop can take weeks, and there are so many variables,” says Danielle.
Keeping meticulous notes early on, she began to see patterns emerge, allowing her to predict and recreate glaze results more reliably.
“As I got better at tracking my process,” Danielle explains, “I began to see patterns emerge and was able to begin to predict results a little bit better. I don’t always understand the why behind certain reactions but I was able to start to recreate them.”
The next part of her process was problem-solving.
Now that she could recreate results, she wanted to also figure out how to address common issues.
So she did a lot of research.
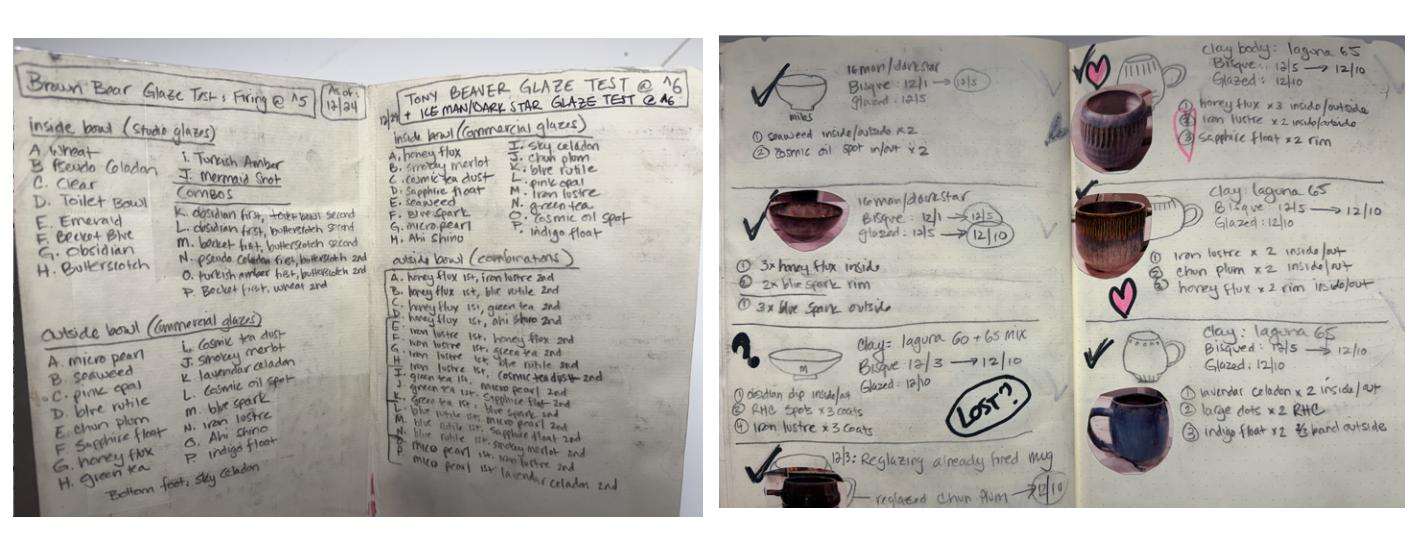
Danielle’s early journals
Refining the Process Through Research and Community
Danielle turned to the pottery community for guidance and inspiration:
Facebook Communities:
Reddit Communities:
She bookmarked artists she admired, lurked quietly at first, then began asking questions.
“The community is open, welcoming, and helpful. People generally share their excitement,” Danielle reflects.
Discovering the Frozen Pond Glaze Technique
While exploring social media, Danielle discovered Kathy McGuire’s Frozen Pond Technique.
“I immediately fell in love with the combinations and patterns that frozen pond creates,” says Danielle.
Some of Danielle’s favorite ceramic artists using the frozen pond technique on Instagram are:
Kathy McGuire: @klm4655
Samy Boulos: @seaboulos.pottery
Frederick Fitzgerald: @fredfitzpottery
Frida: @fh.keramik
Danielle began to experiment with the frozen pond technique so that she could better understand how it worked.
How to Do the Frozen Pond Technique (Step-by-Step)
Danielle’s basic formula:
Apply two coats of a stable base glaze
Add two coats of Running Hot Chowder (RHC)
Layer a flowy flux glaze on topFire to Cone 5 or 6
Record your results and continue to experiment!
For Danielle, this combination usually seemed to give the most dramatic and reliable results.
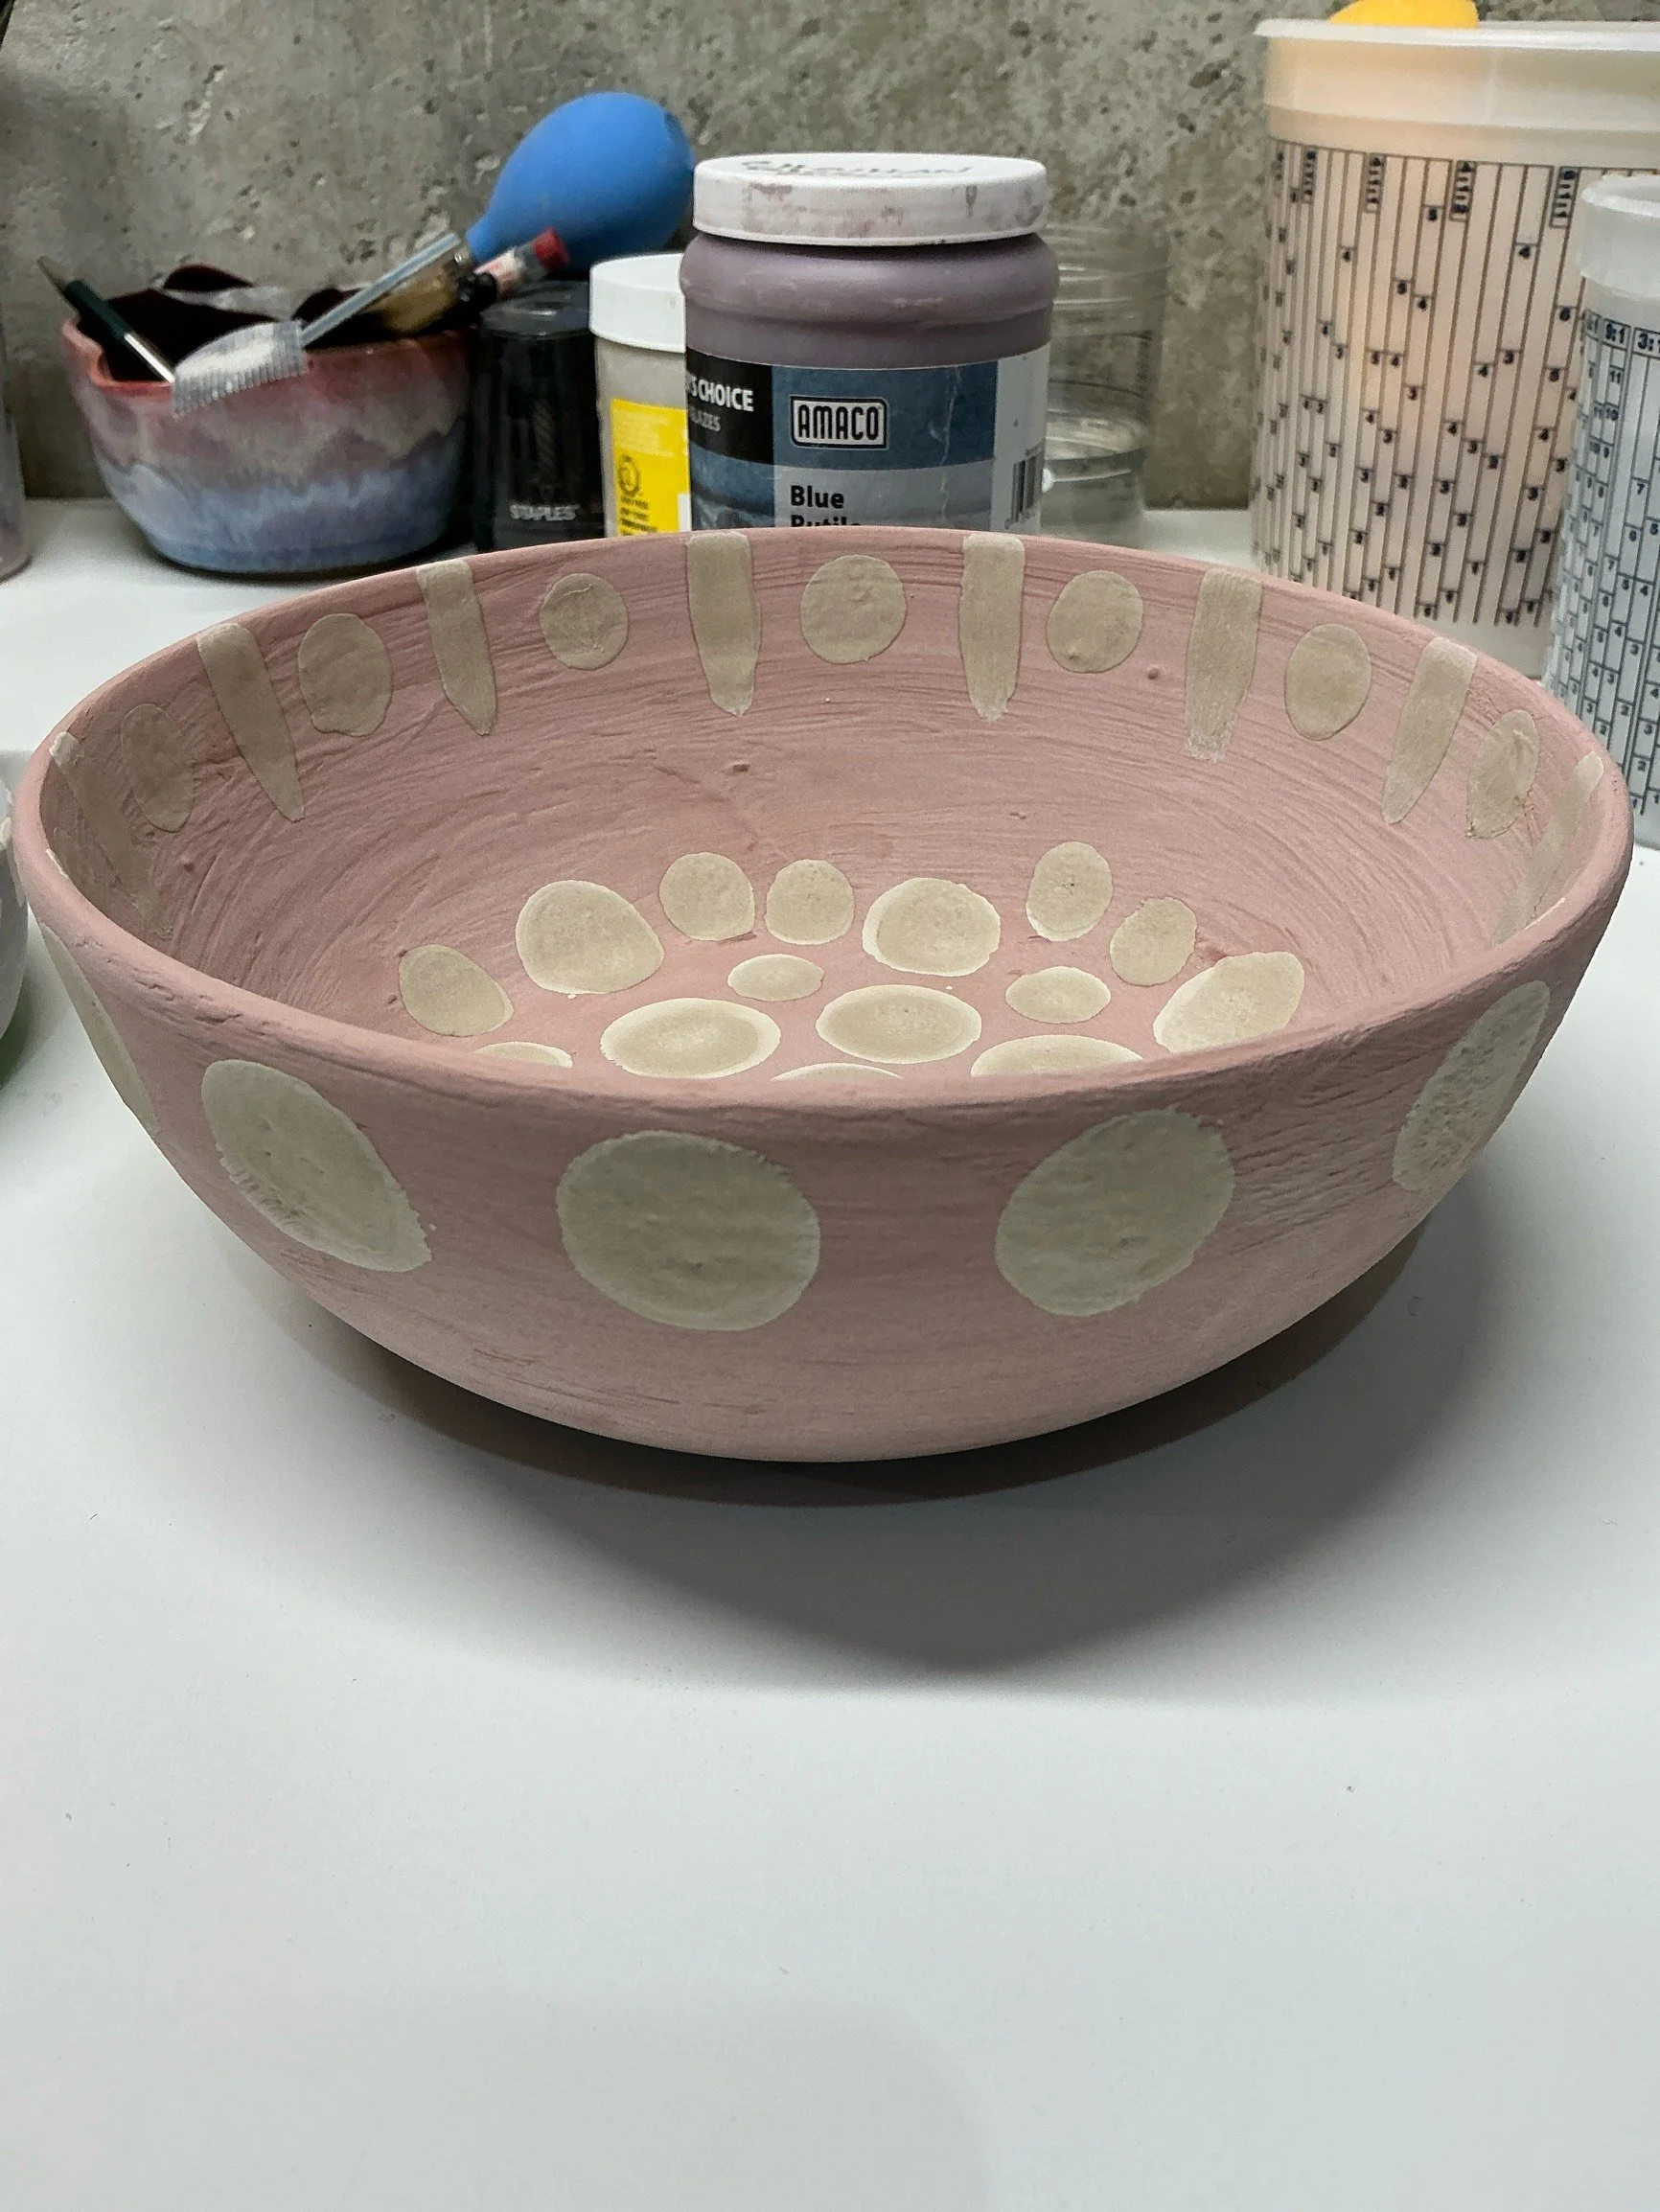
Making Test Tiles for Glaze Layering
In order to track successes and failures with different combinations, Danielle created ceramic test tiles.
She experimented with different glazes for base layers and flowy top layers.
Best Glaze Combinations for the Frozen Pond Technique
Favorite Base Glazes:
Any of the Amaco Celadons
Favorite Top Glazes:
Alternatives to Running Hot Chowder
For the middle layer, Danielle finds that Running Hot Chowder is the most reliable middle layer, but she has also experimented with similar glazes like Supernova or Moon River.
Danielle reflects, “Each trial taught me something new. The key here is in consistently recording your process.”
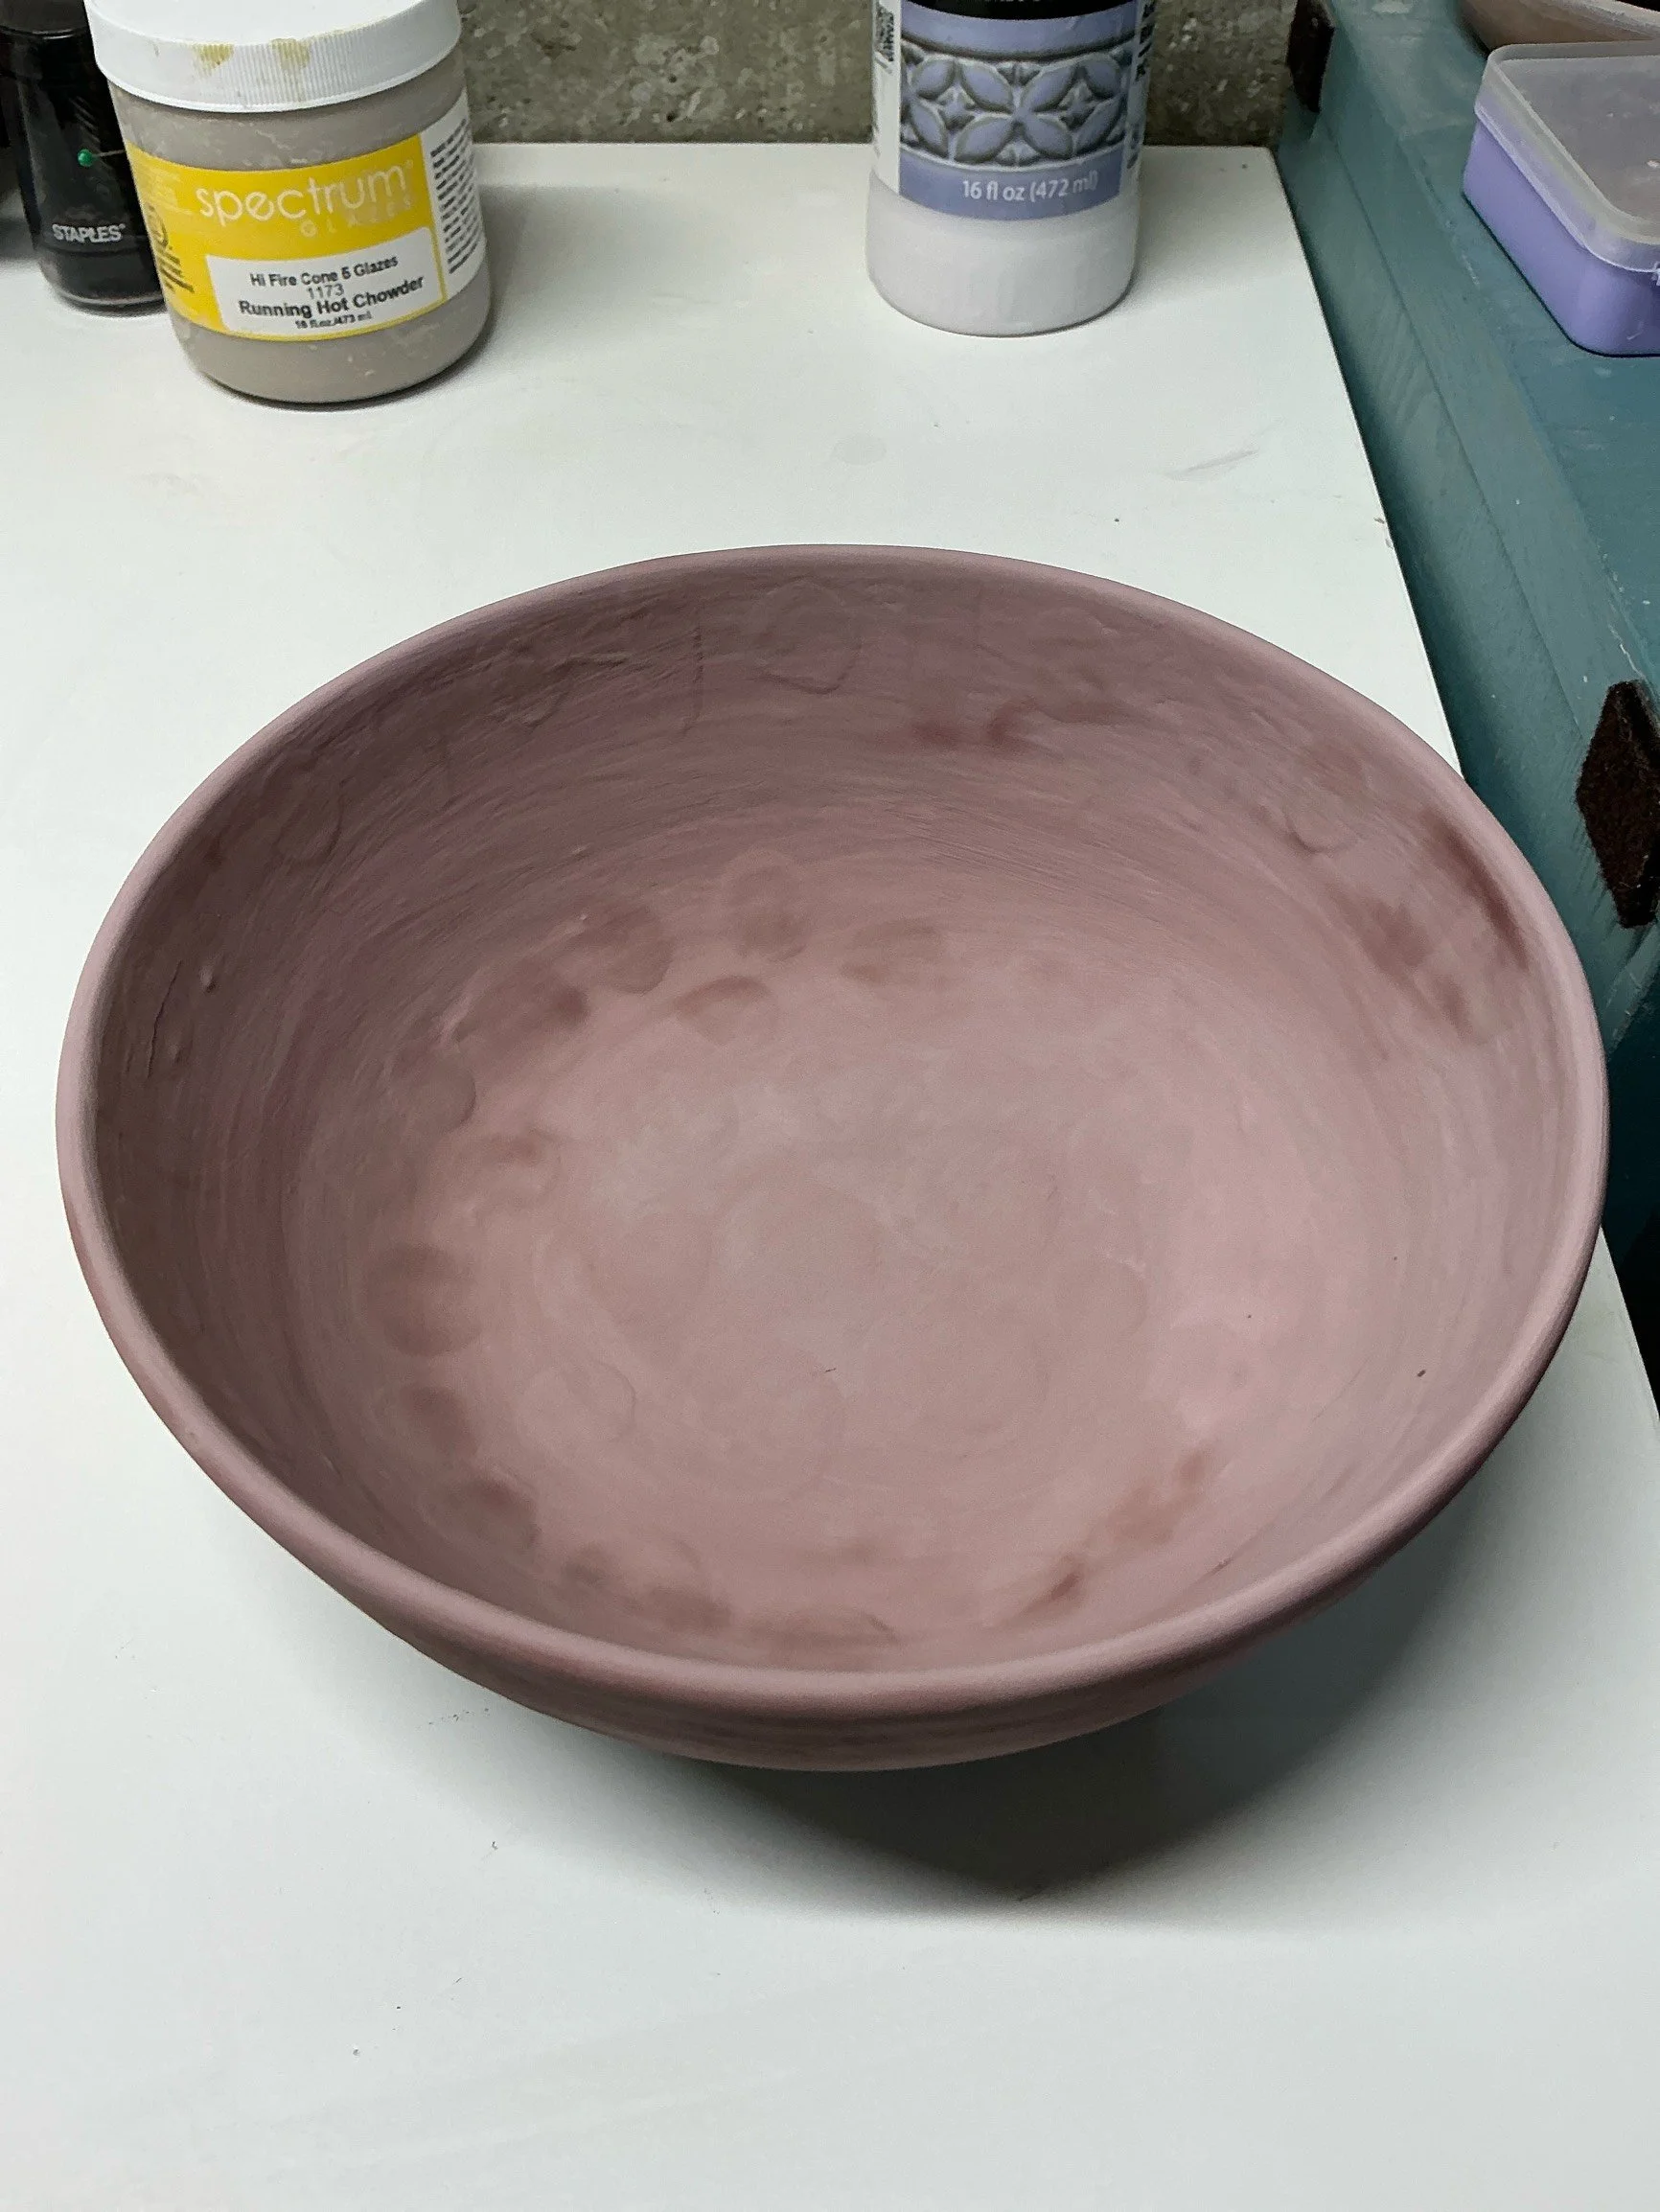
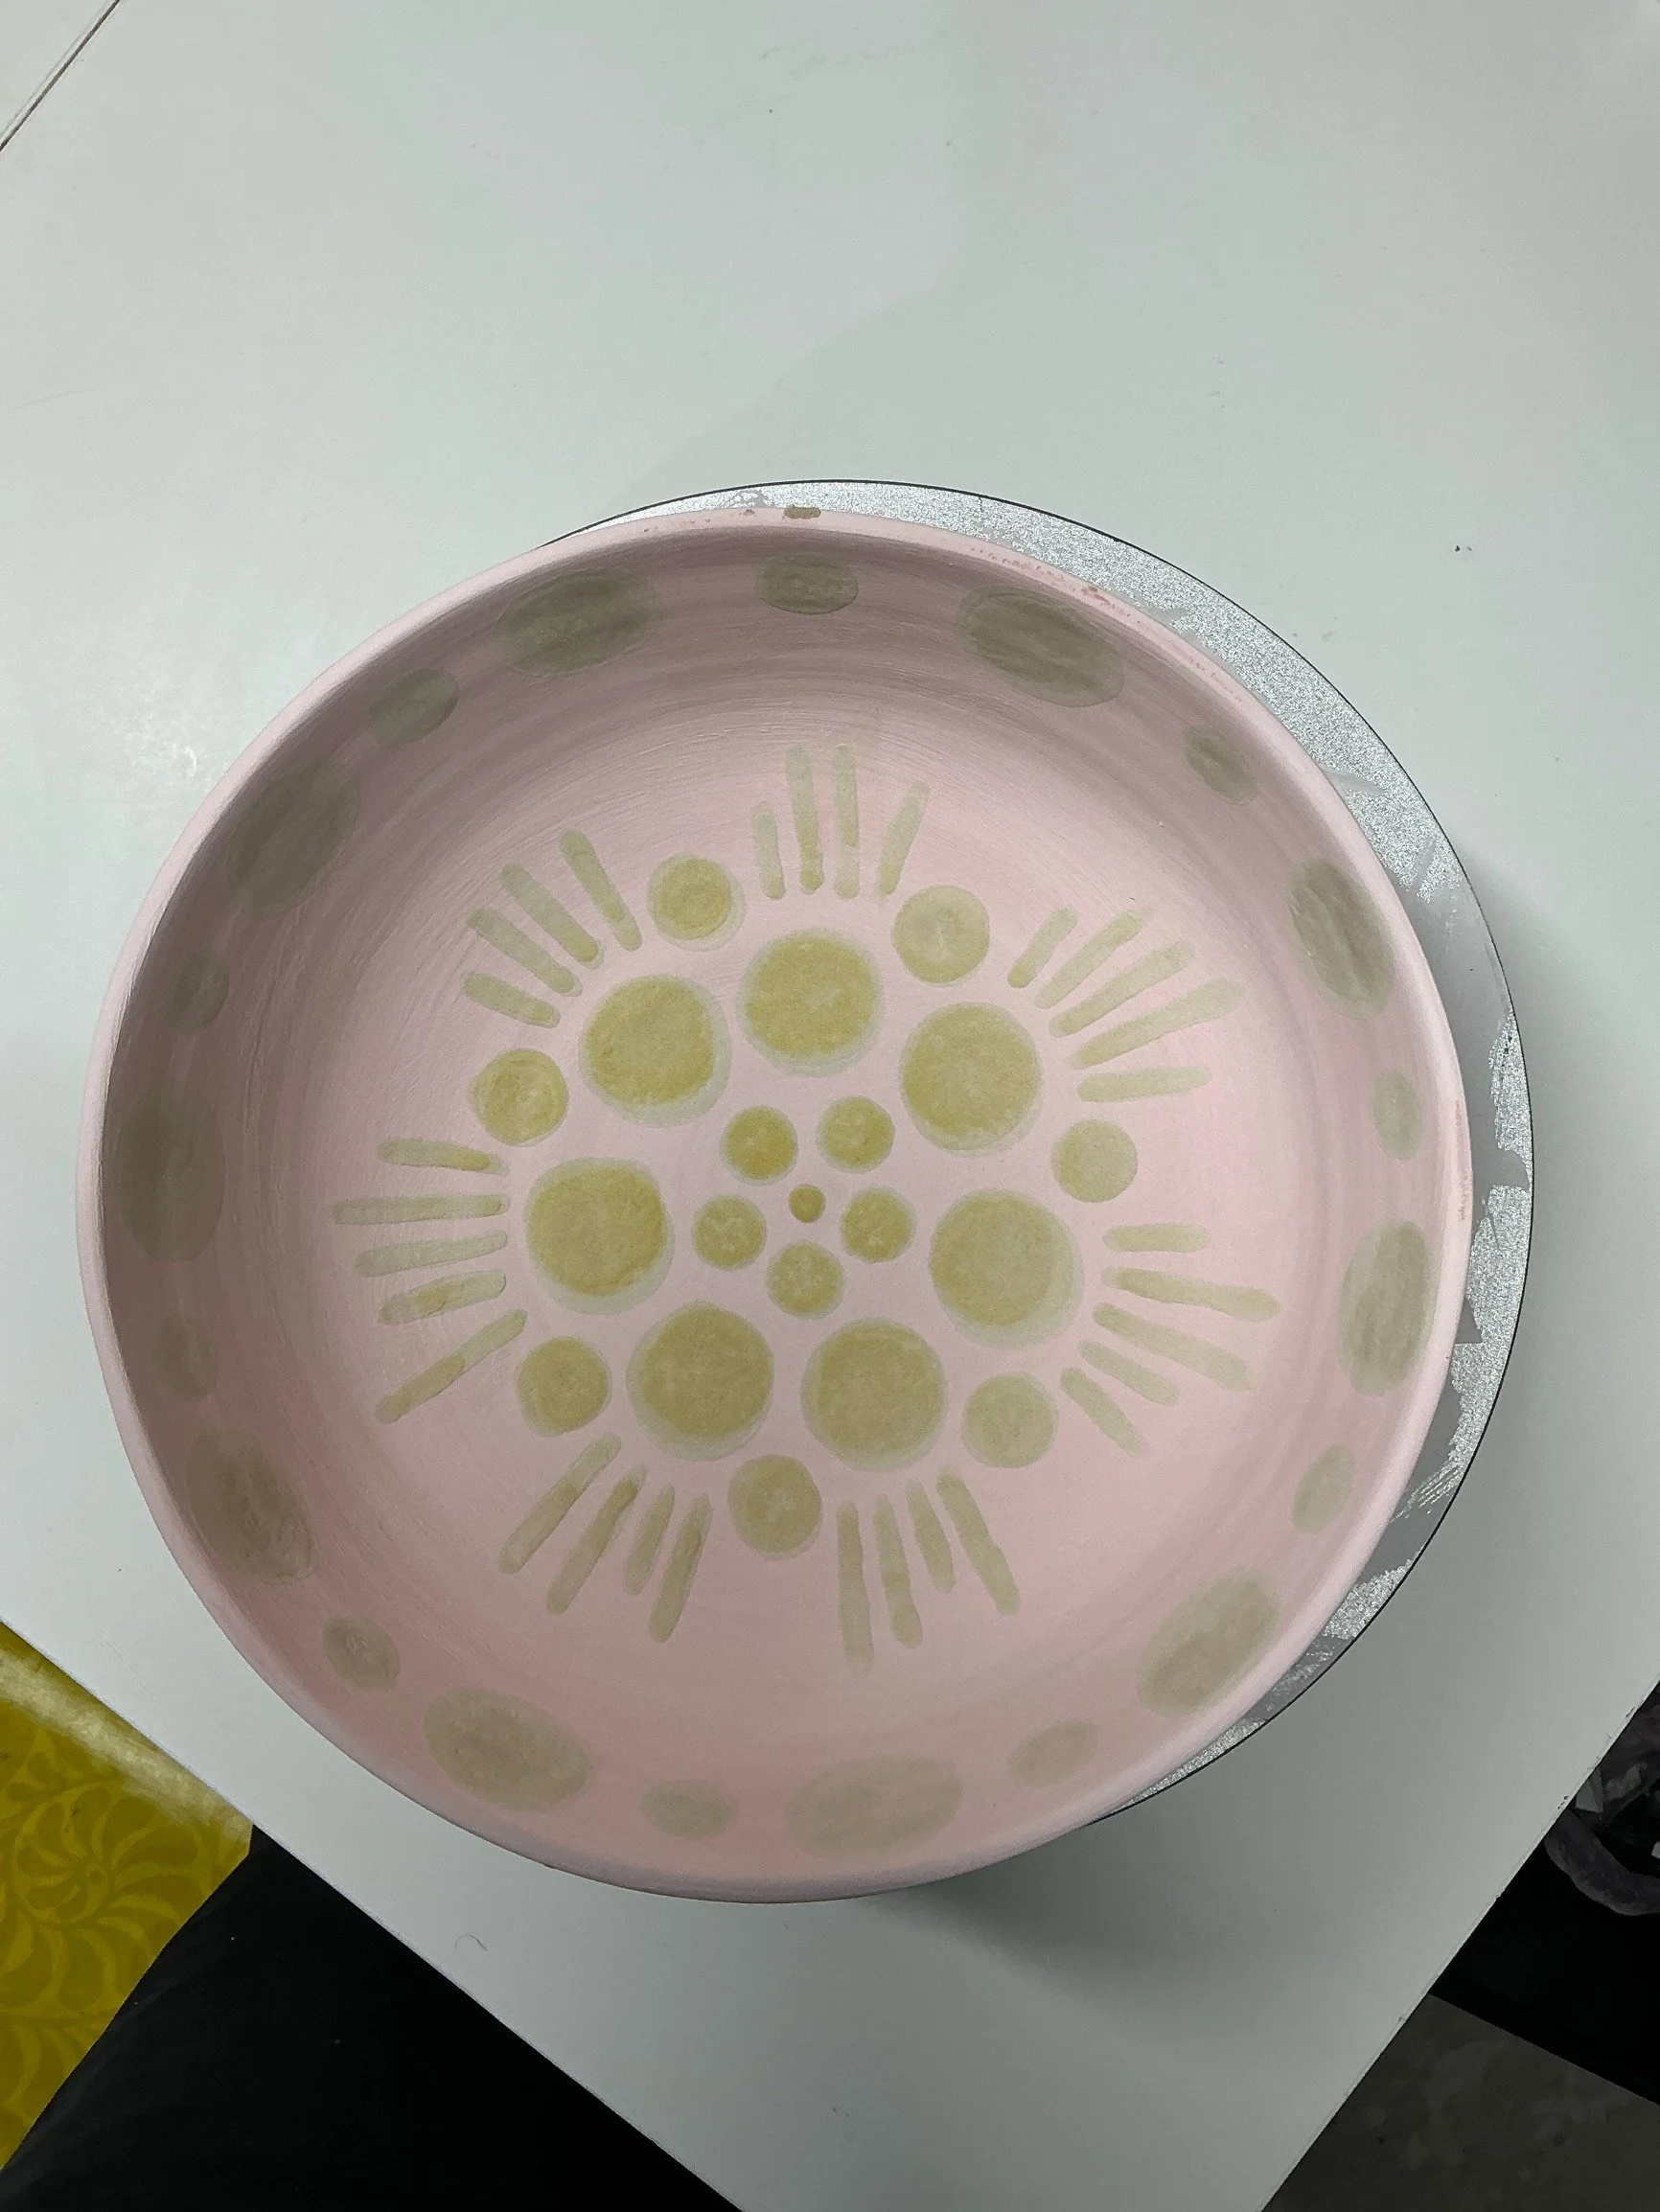
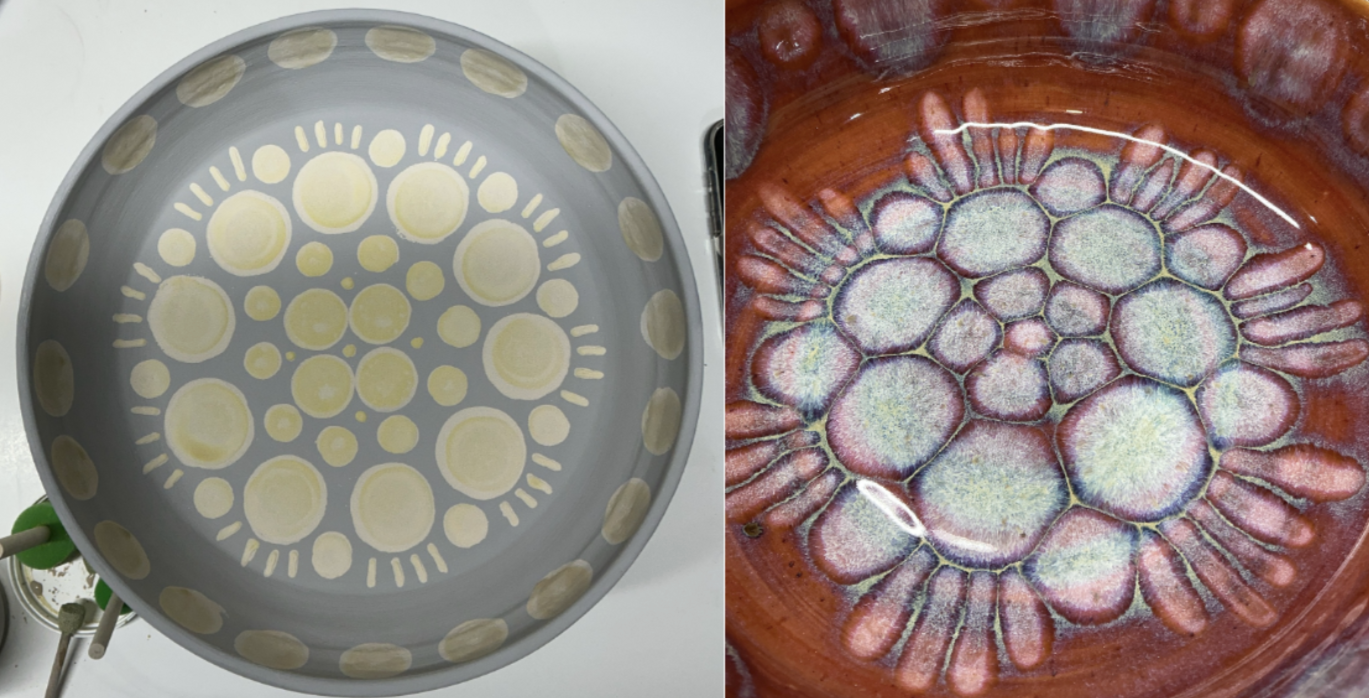
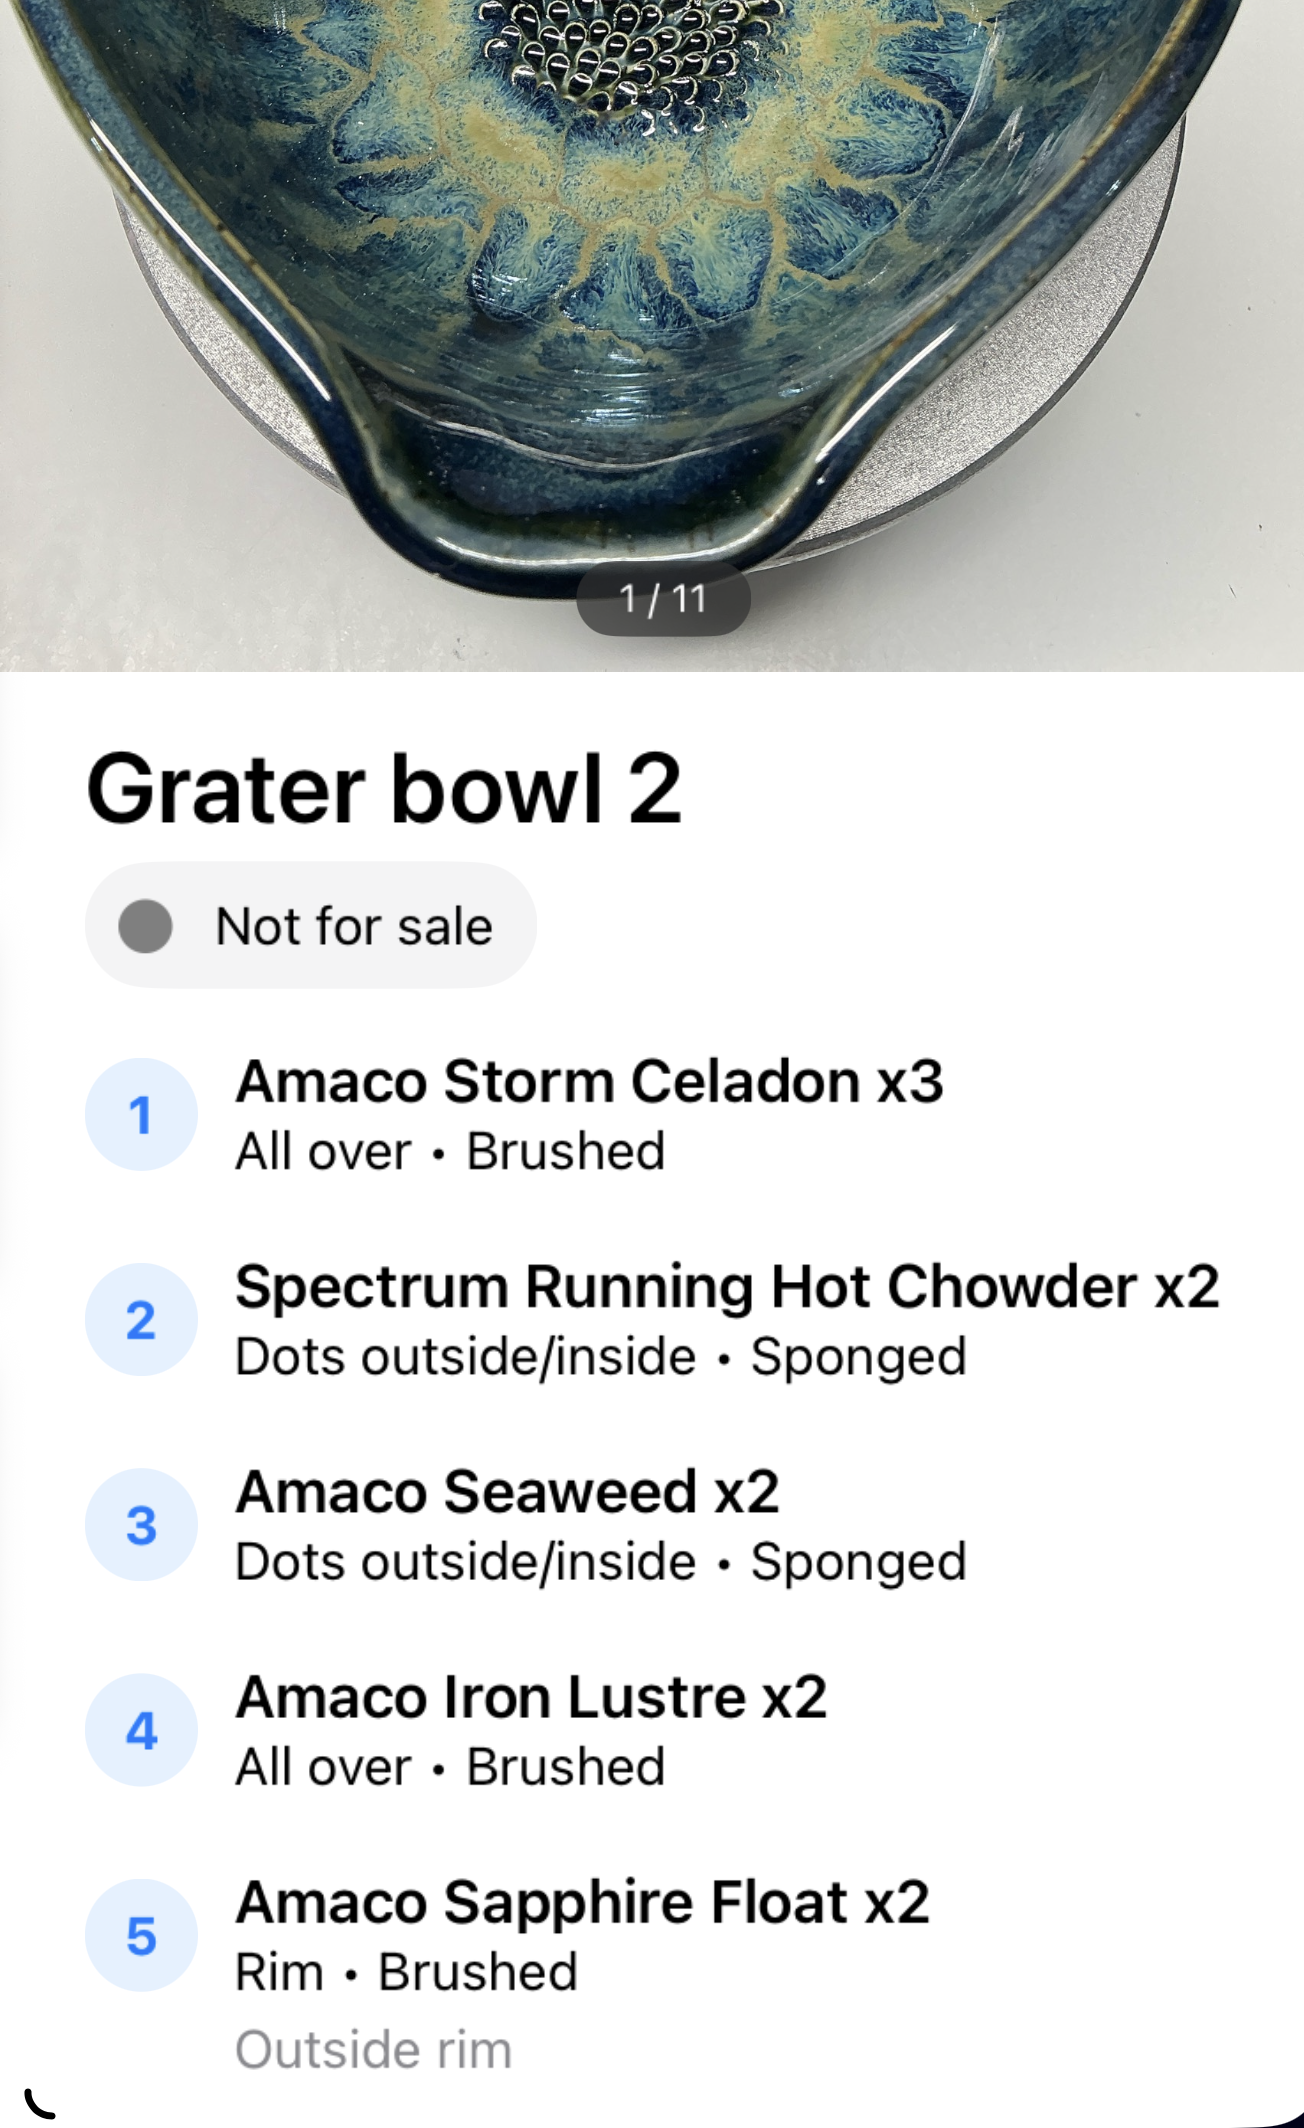
Before & After + A Frozen Pond Recipe:
Three coats of Amaco Snapdragon Celadon as the base
Two coats of Spectrum Running Hot Chowder (applied with a sponge or brush)
Two coats of Amaco Iron Lustre on top.
Recording Your Glazing Process for Consistency
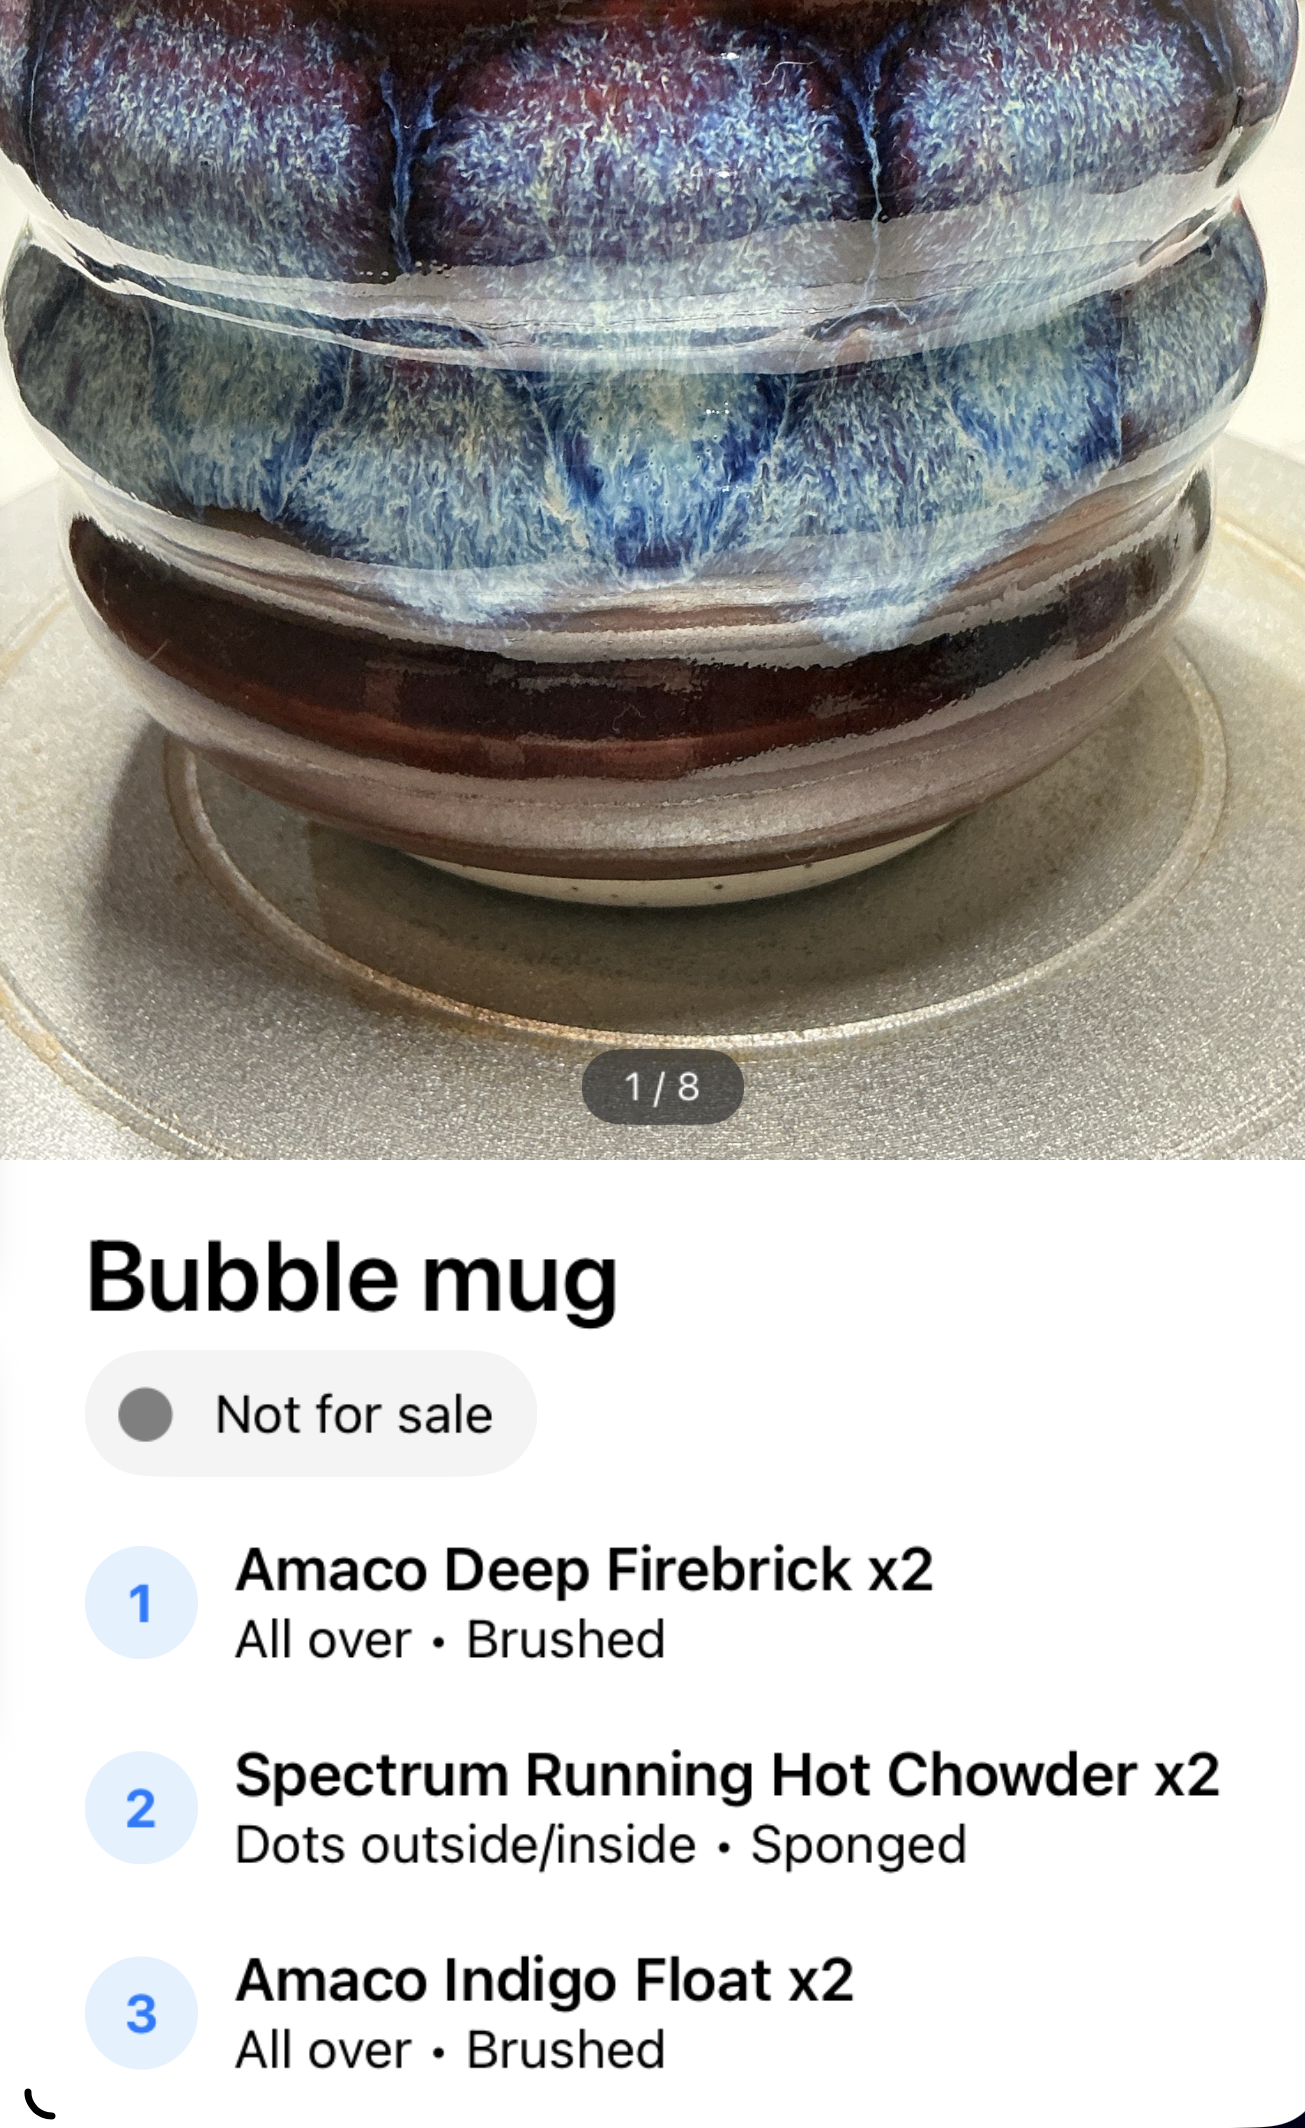
Danielle transitioned from notebooks and test tiles to using the ClayLab app, which allows her to:
Track glaze types, layering, combinations, glaze order, and number of coats
Record firing schedules and shelf placement
Photograph stages to observe how brush strokes and application techniques impact glaze flow and results
“I was able to recreate favorites with greater accuracy,” she says, “and I was able to recognize patterns since I could now search and filter my finished work.”
Troubleshooting Kiln Firings and Frozen Pond Glaze
Danielle reflects that one of the greatest challenges for her at this stage remains the firing process.
She was initially firing in a community kiln and her pieces were fired either to Cone 5 or 6, depending on her clay body. She began to notice differences in the way her work came out at different cones.
Having recently set up her own home studio with her own kiln, a Skutt 822-3, she shares:
“It’s new and still intimidating to me, and the risk of ruining pieces is quite high. I began with the basic Cone 5 firing schedule and noticed issues with expected colors not being as bright, as well as pinholes in my glazes.”
Fixing Pinholes in Glaze
Danielle noticed pinholes caused by manganese flecks off-gassing in her clay body. Research led her to the Camille Hoffman firing schedule (which she recommends Googling). This method includes ramps and holds to allow for proper off-gassing. This fixed her pinhole issue.
Adjusting Your Firing Schedule
She experimented with Cone 5 and Cone 6 firings, eventually settling on hot Cone 5 for consistent results for her frozen pond glazing.
“Different brands, and the glazes themselves, perform better at different cones,” Danielle explains, “so make sure to always measure results on each shelf in the kiln with pyrometric cones.”
Why Recording Your Glazing Process Matters
The frozen pond technique, like all glazing, is about experimentation and patience.
Each piece Danielle glazes can take up to an hour, including layers, application, and documenting her process using the ClayLab app.
“Glazing in the frozen pond technique is exciting, beautiful, and satisfying,” reflects Danielle, “It often feels like magic. It is also complicated, slow, frustrating, and can be quite expensive if you are purchasing all your own glazes.”
“The best part of the process,” she adds (very much in the spirit of the Potter to Potter blog series), “is learning and connecting with others.”
Watching customers fall in love with her finished pieces is the ultimate reward.
Looking for another popular surface decorating techniques, check out this Potter to Potter Feature on Crepe Tape Resist with Allie Karthaus.
Is the Frozen Pond Technique Worth It?
If you’d like to try your hand at Frozen Pond, Danielle’s advice is simple:
“No matter where you begin, record your steps diligently. It will help you make sense of both your successes and failures.”
Check out Danielle’s pottery at @clayartsstudioc or www.clayartsstudioc.com.
This blog post was written by Meesh Pottery in collaboration with Danielle Chouhan.
As an Utrecht, Blick, and Amazon associate, Meesh Pottery earns from qualifying purchases. As an independent artist, every bit of support counts! Meesh Pottery also donates 10% of profits to non-profits that serve BIPOC and LGBTQ+ communities in need. Learn more.